The process I use for doing a live demo is similar to how I create online training courses. Our goal is to be able to see the code for the finished version of the lesson and compare it to what we're typing during the demo. If we make a mistake, we can see where we've missed or mistyped code. We can do that using features in Visual Studio Code, Git and Github. How you approach it depends on how complex your demo is going to be.
A simple demo
First, let's take a look at how we would approach this with a simpler demo; perhaps a single file without a lot of code. To get started, I'm going to clone a github repo I've prepared. It's the same repo we'll publish later, I'm only going to download a specific branch.
cd ~/Desktop ## put it wherever you want, The desktop for me
git clone --single-branch --branch master https://github.com/planetoftheweb/demo-notyf
Now that's going to get a copy of the repo, but only the master branch (You'll see later that our default branch will eventually be different) let's assume that I don't want any sort of git history to begin with so we'll clear that.
cd demo-notyf
rm -dfr .git
This will remove the git tracking and just leave the directory with an index.html file. Open that up with Visual Studio Code, so I can just run a code command on the current folder.
code ./Committing our finished state
The first step is for our project to write the finished version of the code, which we've done by cloning our repo. You can use Git to make a commit with this finished version.
git init
git add -A
git commit -m "finished state"
Now, delete some code so that it shows the file at the beginning of my demo. That's all you need to do for this simple version. Once I begin my demo, if I want to see what I'm missing in this code, I could do a git diff command.
git diffUnfortunately, this is confusing because we're using the terminal, so it's not that helpful.
Using Visual Studio Code
If you're using Visual Studio Code, you get the same thing integrated into the editor.
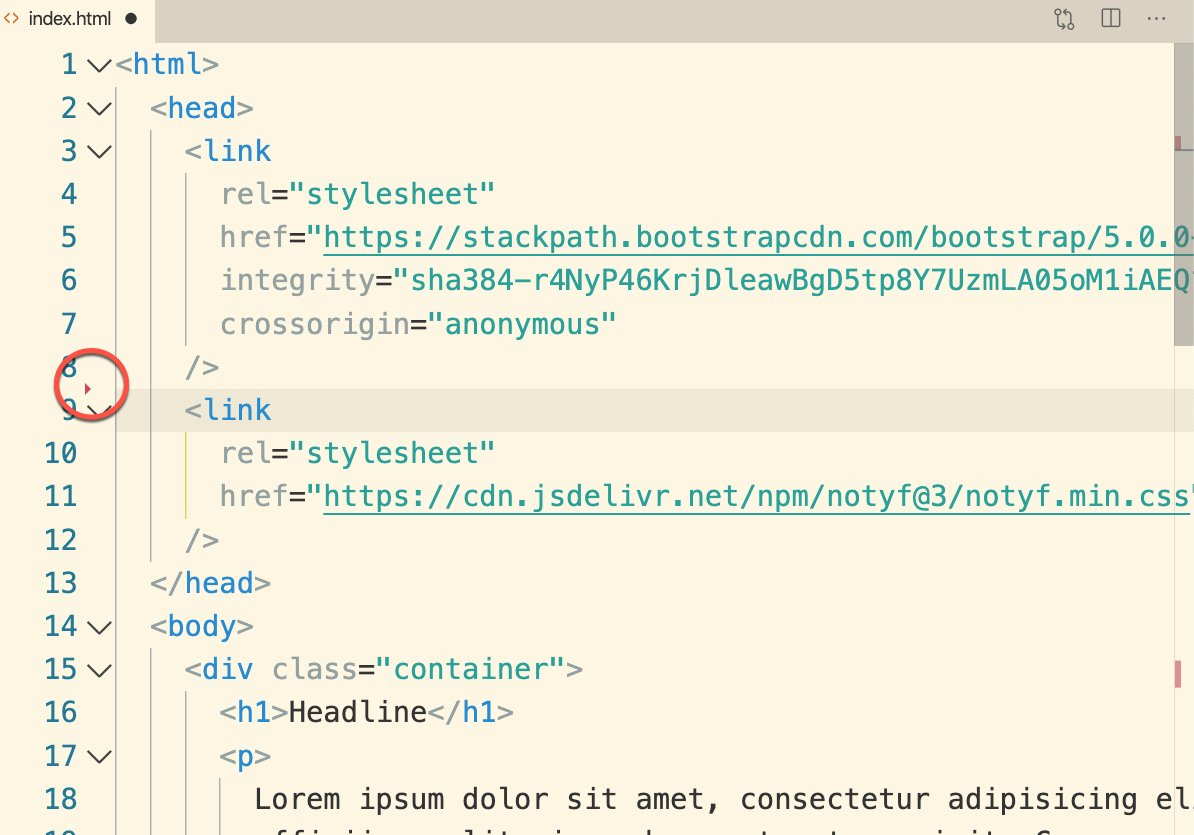
Notice the small triangle next to where the new code should be. When you hover on this triangle a line should appear next to it. If you click on it, you can see the code you're supposed to type.
Using the shortcut icons
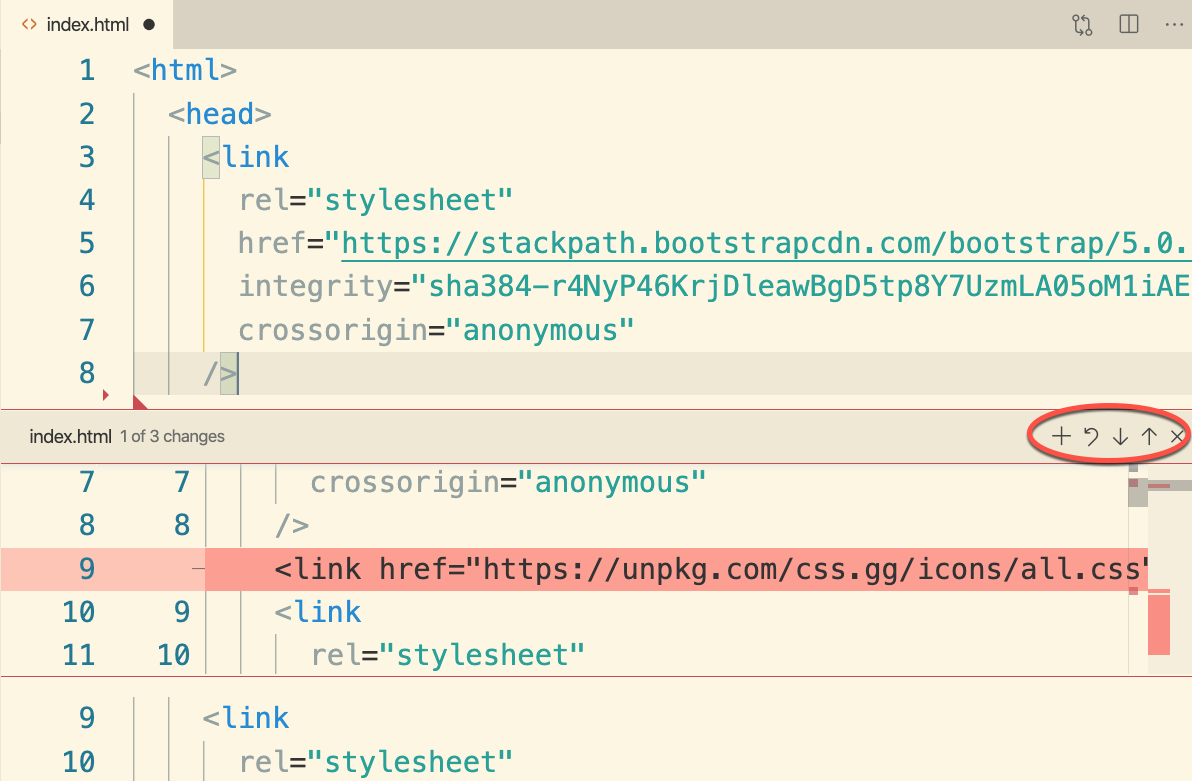
You can use the icons on the right hand side to perform git functions. From the left.
- The
plus signwill stage the change - The
rotated arrowwill revert the change...in our case, that would put the finished code back on the page; - The
upanddownarrows will move up and down the code - The
xwill close the window.
Typing in new code
The nice thing is that if you type in some code, the view will update as well, telling you where code than is different that you should have typed is.
Let's go to the bottom of the page so we can type in the script for a notification.
Let's add some code at the bottom of the screen so that we can see how it works when we're demoing our code.
<script>
let notyf = new Notyf({
  duration: 0,
  dismissible: true
})
notyf.success('Way to go Bud')
</script>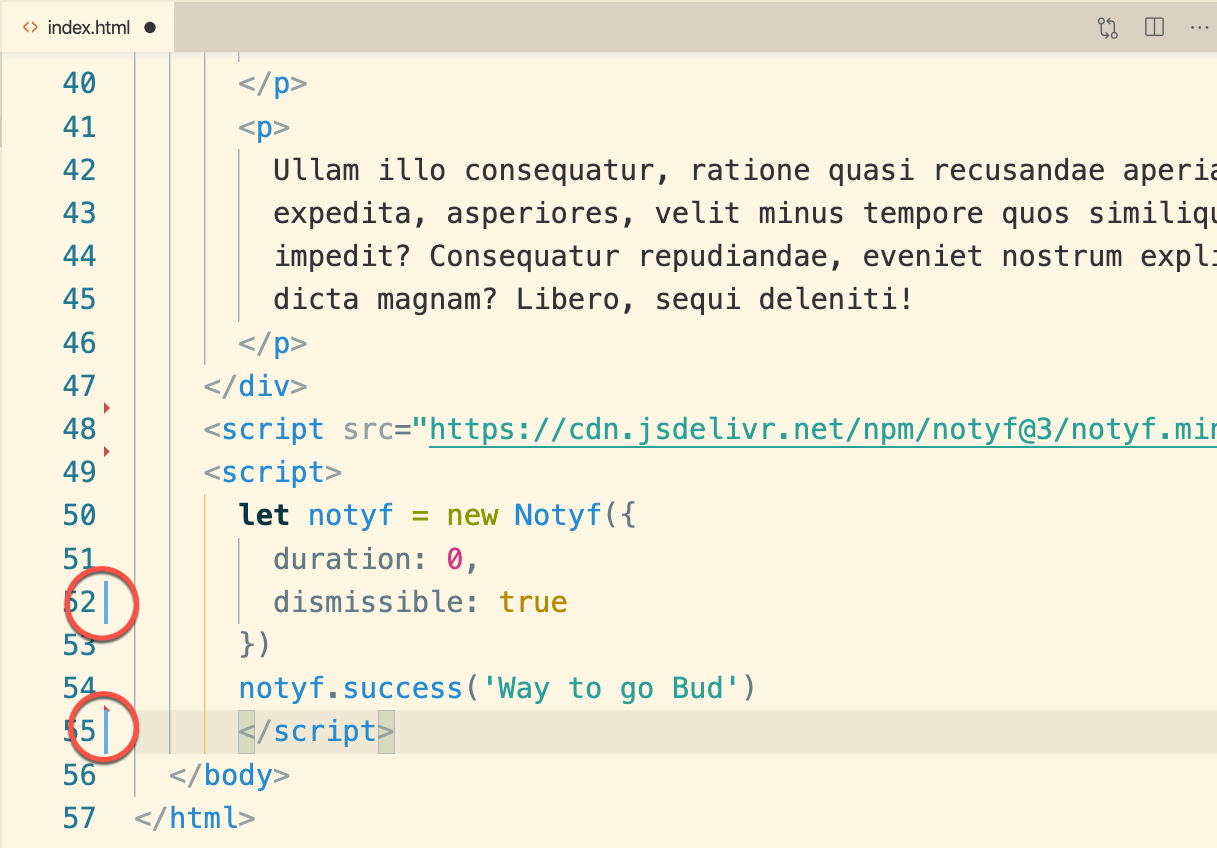
Take a peek at your editor now. You can see that It's showing you some lines where some of the code you've typed is different than the code you're supposed to type.
Debugging mistakes
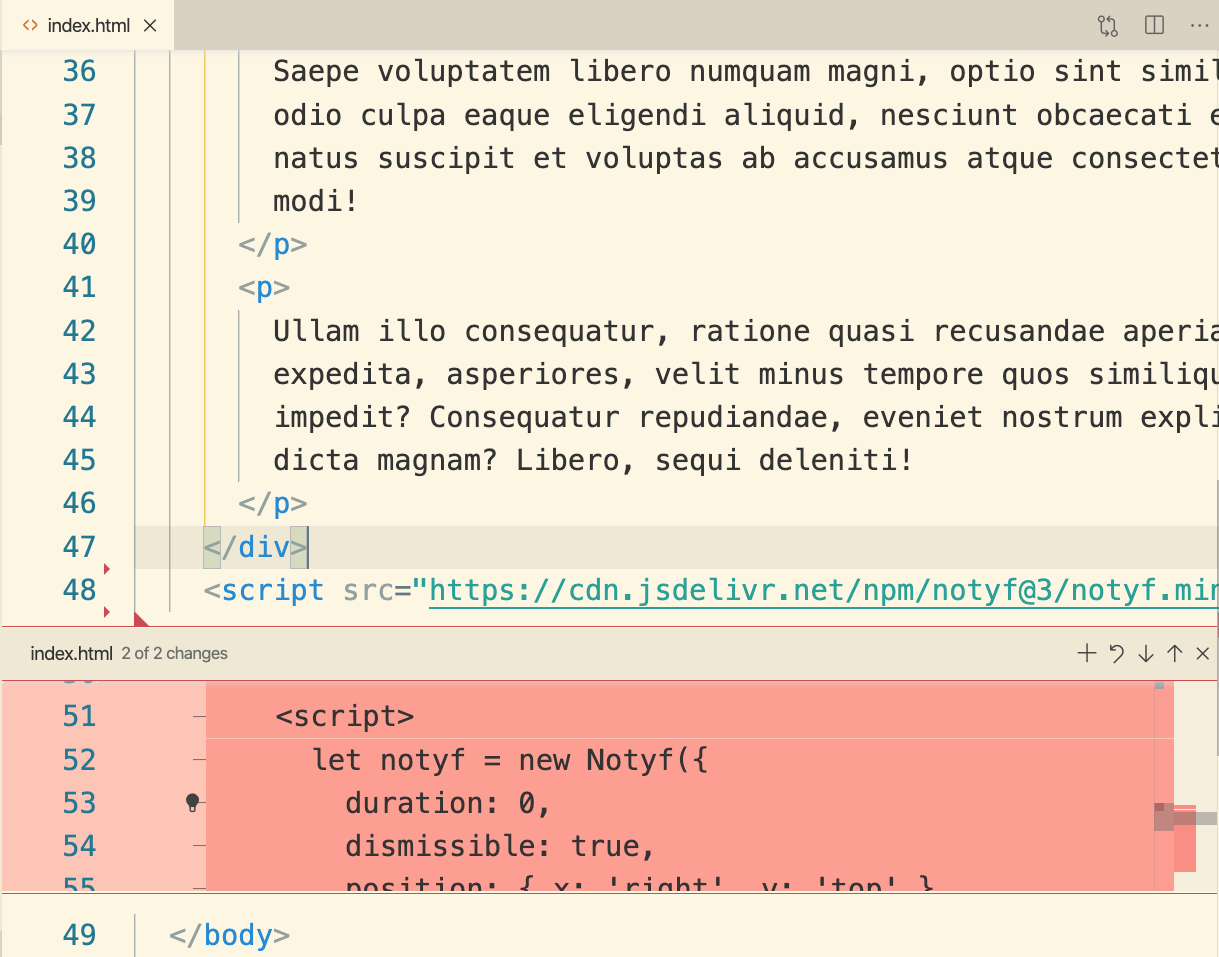
Let's make a mistake on purpose. I'll get rid of the { at the end of my Notyf call. You should see a new line appear and if you click on that line you'll see where your mistake is.
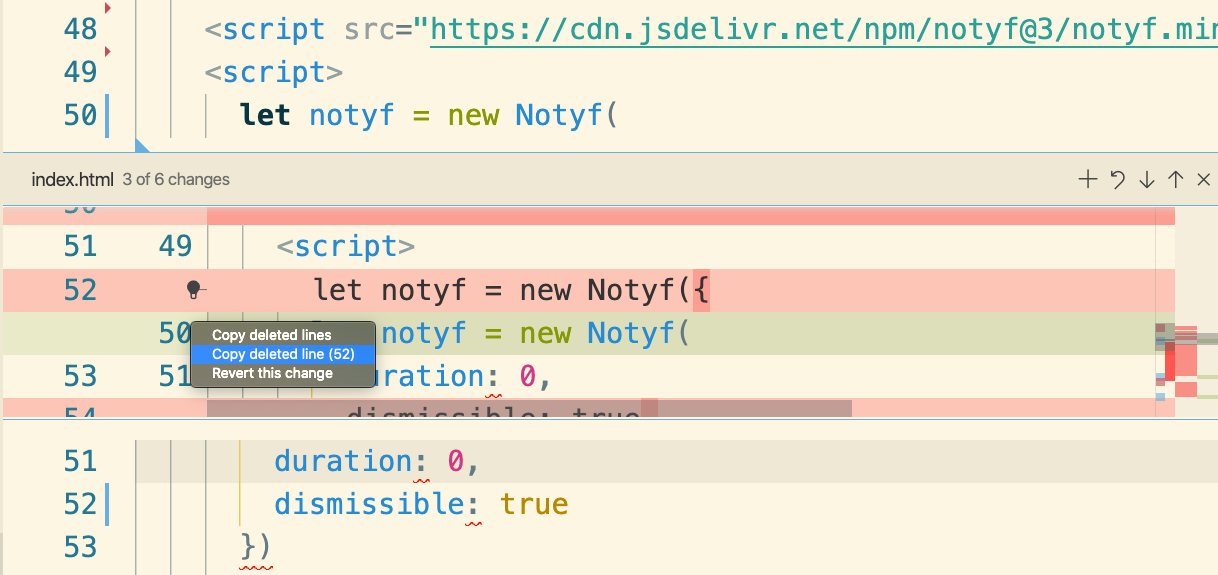
VS Code is giving you all types of help here. It's highlighted where the missing curly brace is and showing you the line you typed underneath. Notice there's a little lightbulb to the left. If you click on that you can also copy a specific line. That's good if you don't want to revert a bunch of lines.
Using the Github Desktop app
Now sometimes this view can be distracting during a demo, so you can use an external tool that shows you what you need to type during the demo. A super nice and free option is the Github Desktop Application. You can visually see the changes there.
Make sure you've saved the document before you open up the Github Desktop App; there will be some setup required. Once you've run the app go to the file menu and open the file or folder with your project.
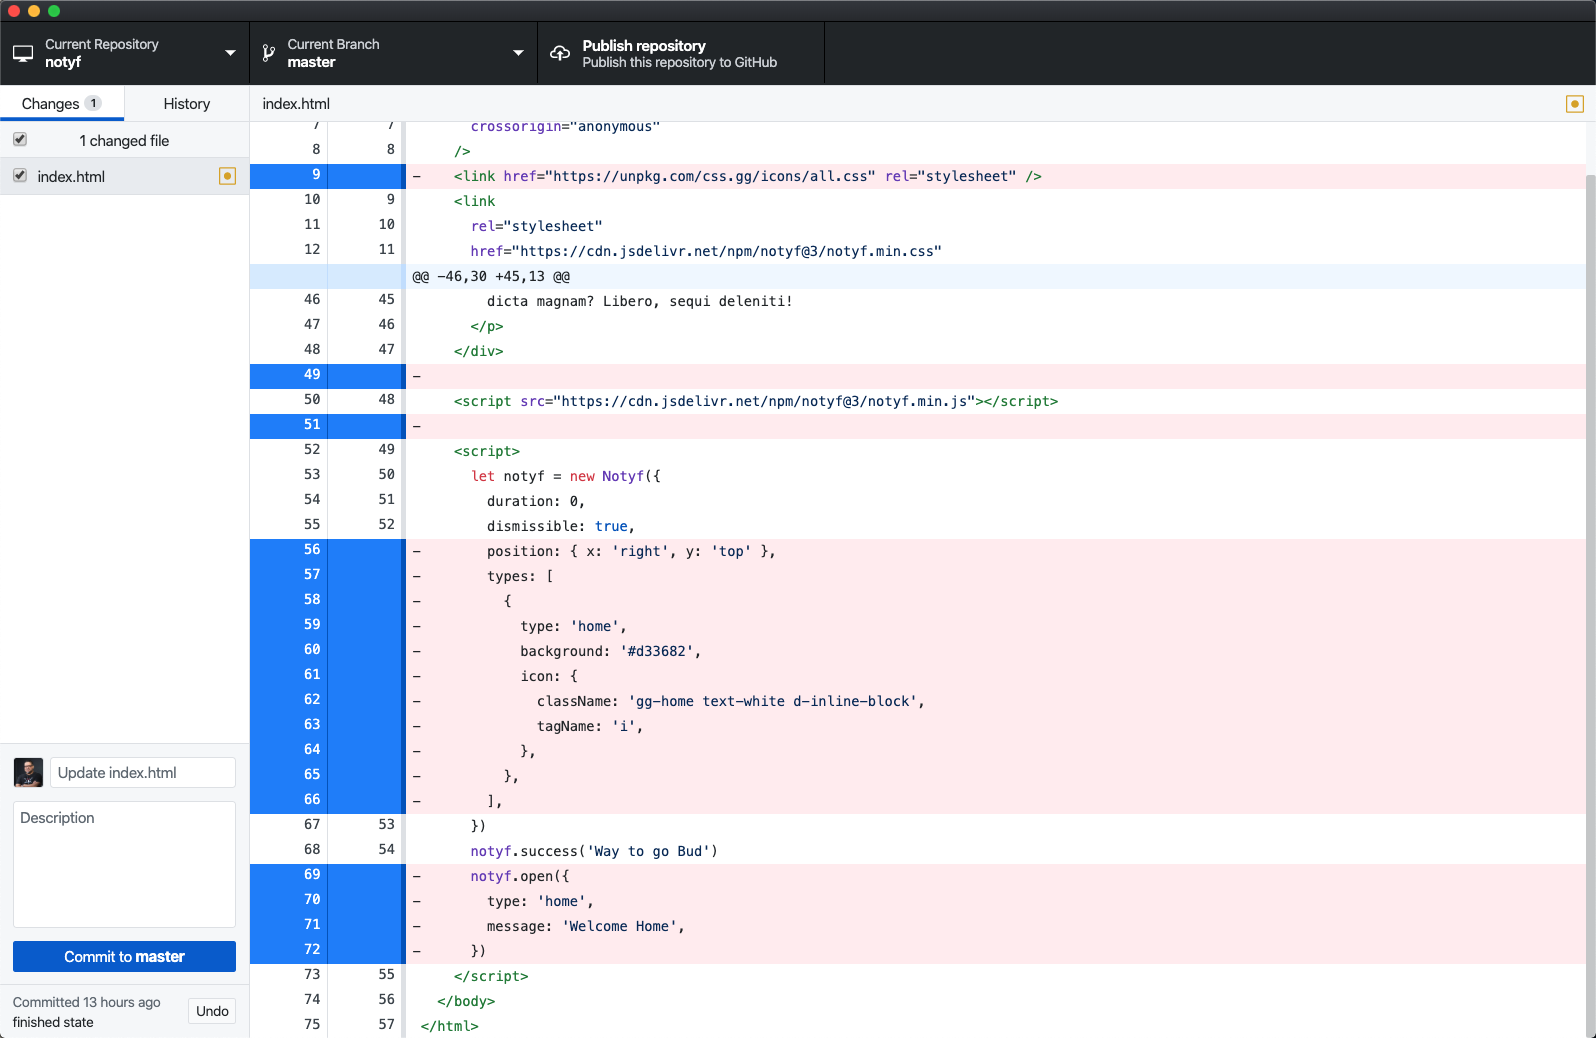
This is a great overview that you can have in a separate window when doing your demo. You can also send a screenshot of this and put it on an ipad that you can reference.
Using Separate Branches
What if you have a lot of code in different files, or you have a lot of code that you don't want to do all at once? In that case, you can create branches to separate each step. You'll need to think about what you want to show in each step though and create a starting version of your code.
Creating a starting state
For my code, I want just a simple template with the bootstrap css and no script tags.
<html>
  <head>
    <link
      rel="stylesheet"
      href="https://stackpath.bootstrapcdn.com/bootstrap/5.0.0-alpha1/css/bootstrap.min.css"
      integrity="sha384-r4NyP46KrjDleawBgD5tp8Y7UzmLA05oM1iAEQ17CSuDqnUK2+k9luXQOfXJCJ4I"
      crossorigin="anonymous"
    />
  </head>
  <body>
    <div class="container">
      <h1>Headline</h1>
      <p>
        Lorem ipsum dolor sit amet, consectetur adipisicing elit. Culpa officiis, velit minus deserunt est suscipit. Consequuntur laboriosam est,
        illum totam voluptates tempore commodi ut, molestiae nulla vel dicta aperiam tenetur?
      </p>
      ...
    </div>
  </body>
</html>
That seems like a good start. Let's save this and create a branch for our starting point.
git checkout -b step00
git add -A
git commit -m "step00"
Building Step 01
Now we need to modify this to add what would make a good step one. However, you'll notice that our helpful triangles and lines are gone, since as far as Git knows, our commit locked in our changes. This is where Github Desktop is going to come in handy again.
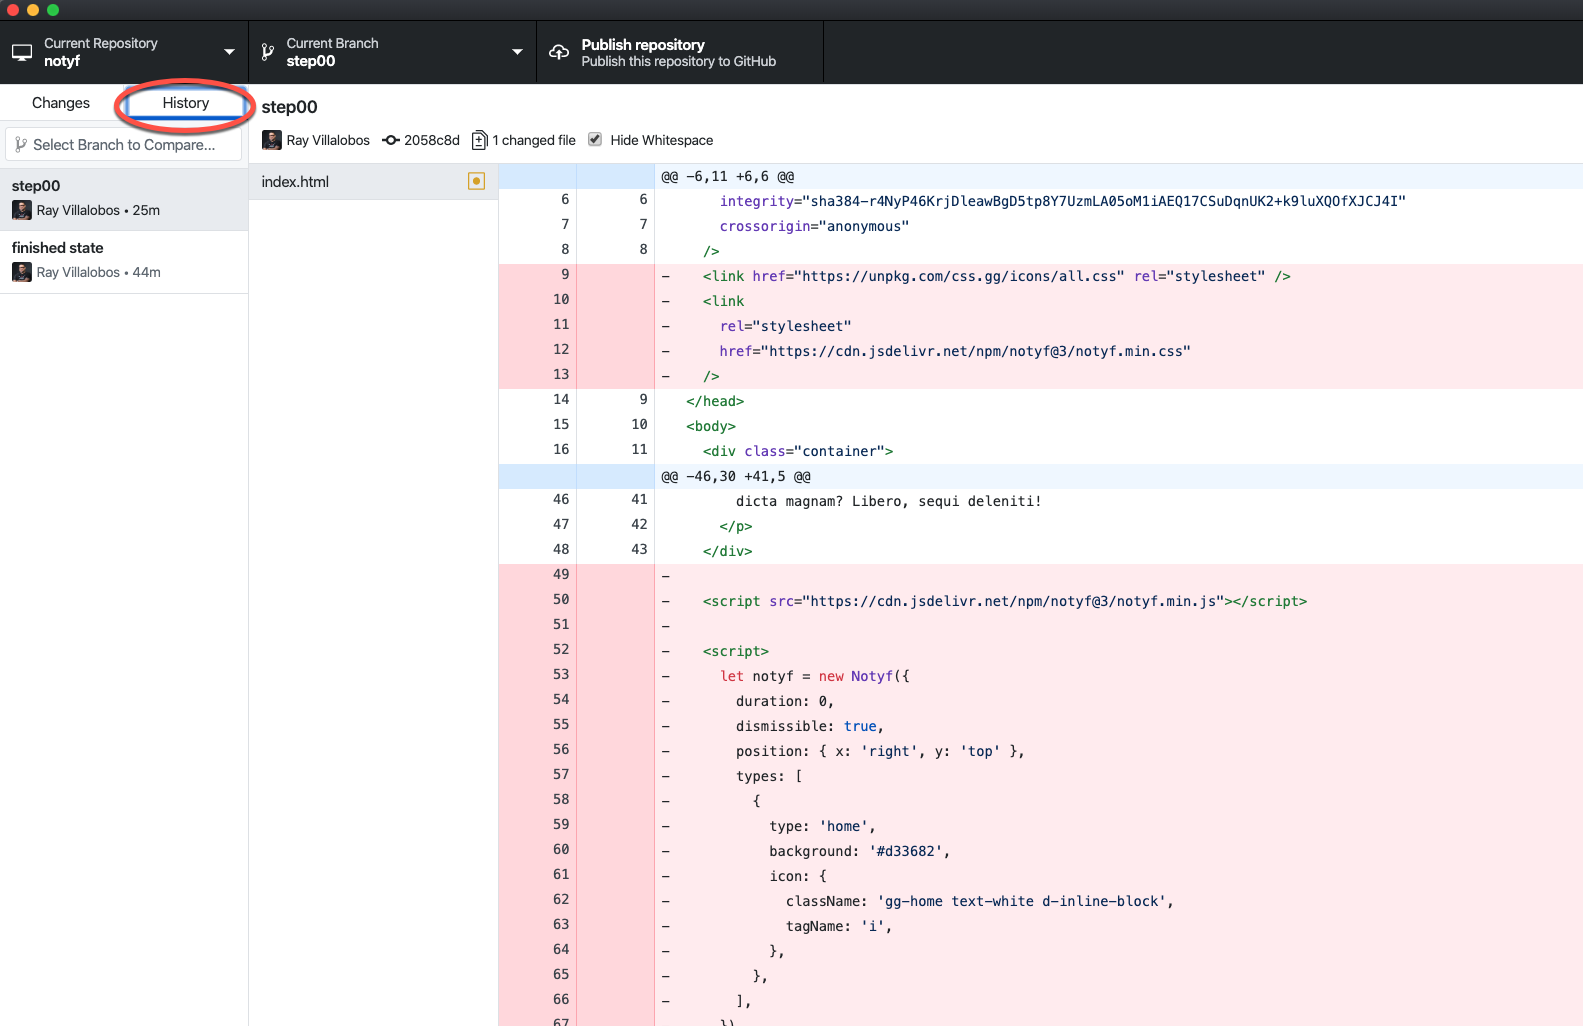
The desktop app saves our history, so make sure you go to the history tab and you should see your changes from the original. The nice thing is that we can copy and paste code from here as well. Let's go ahead and copy the link to the Notyf css here as well as the basic most basic code to create a notification.
<html>
  <head>
    ...
    <link
      rel="stylesheet"
      href="https://cdn.jsdelivr.net/npm/notyf@3/notyf.min.css"
    />
  </head>
  <body>
    ...
    <script src="https://cdn.jsdelivr.net/npm/notyf@3/notyf.min.js"></script>
    <script>
      let notyf = new Notyf()
      notyf.success('Way to go Bud')
      notyf.error('Oh...fudge')
    </script>
  </body>
</html>
I also added an error notification because it'd be nice at this point to show the two options. That looks good for a step01
- Save your file
- Checkout a new branch
- Add and Commit the branch
git checkout -b step01
git add -A
git commit -m "step01"
Adding another step
For the next step, we're going to show some of the options available with the library.
<script>
  let notyf = new Notyf({
    duration: 0,
    dismissible: true,
    position: { x: "right", y: "top" },
  });
  notyf.success("Way to go Bud");
</script>- Save your file
- Checkout a new branch
- Add and Commit the branch
git checkout -b step02
git add -A
git commit -m "step02"
Looking at your progress
For our next step, let's show how to create a custom notification.
<script>
  let notyf = new Notyf({
    duration: 0,
    dismissible: true,
    position: { x: 'right', y: 'top' },
    types: [
      {
        type: 'home',
        background: '#d33682',
      },
    ],
  })
  notyf.success('Way to go Bud')
  notyf.open({
    type: 'home',
    message: 'Welcome Home',
  })
</script>
Now we'll create the branch for this.
git checkout -b step03
git add -A
git commit -m "step03"
If you haven't noticed yet, what this is doing is creating a history for each of our steps and if you look at the Github Desktop App and click on the different steps you can see the progress. Notice that every step will show you what you've changed and the line numbers at which the changes were made, which again can be helpful while doing the demo.
Our last step
Our last step will take place in a couple of lines. First we need to add the link tag to the top of the screen under our bootstrap call.
<link href="https://unpkg.com/css.gg/icons/all.css" rel="stylesheet" />And we'll need to add the icon tag to the type:
icon: {
  className: 'gg-home text-white d-inline-block',
  tagName: 'i',
},
Once again, let's create the branch for that step.
git checkout -b step04
git add -A
git commit -m "step04"
The new demo
So that's the end of splitting our code into different steps, but how does that change the structure of our demo? Clearly the Github Desktop App can be helpful here, we have the full history of our demo here neatly placed in different branches. But let's say we want to work on a specific step. For example, say we want to demo what we did on Step 02.
git checkout step02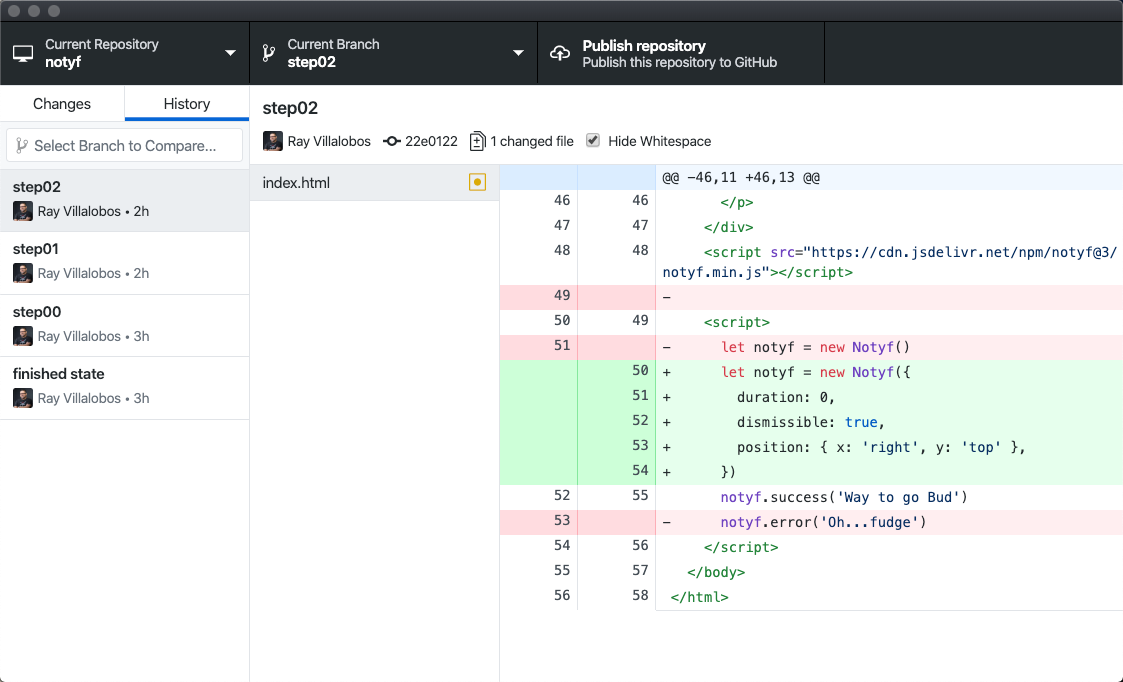
In the Github Desktop App, this shows us the code at the end of step02 and what changes we made from step01 to get to that point. But, if I'm starting to record, then I want to be able to rewind the code so that I'm looking at step 01's version.
A little bit of git-fu
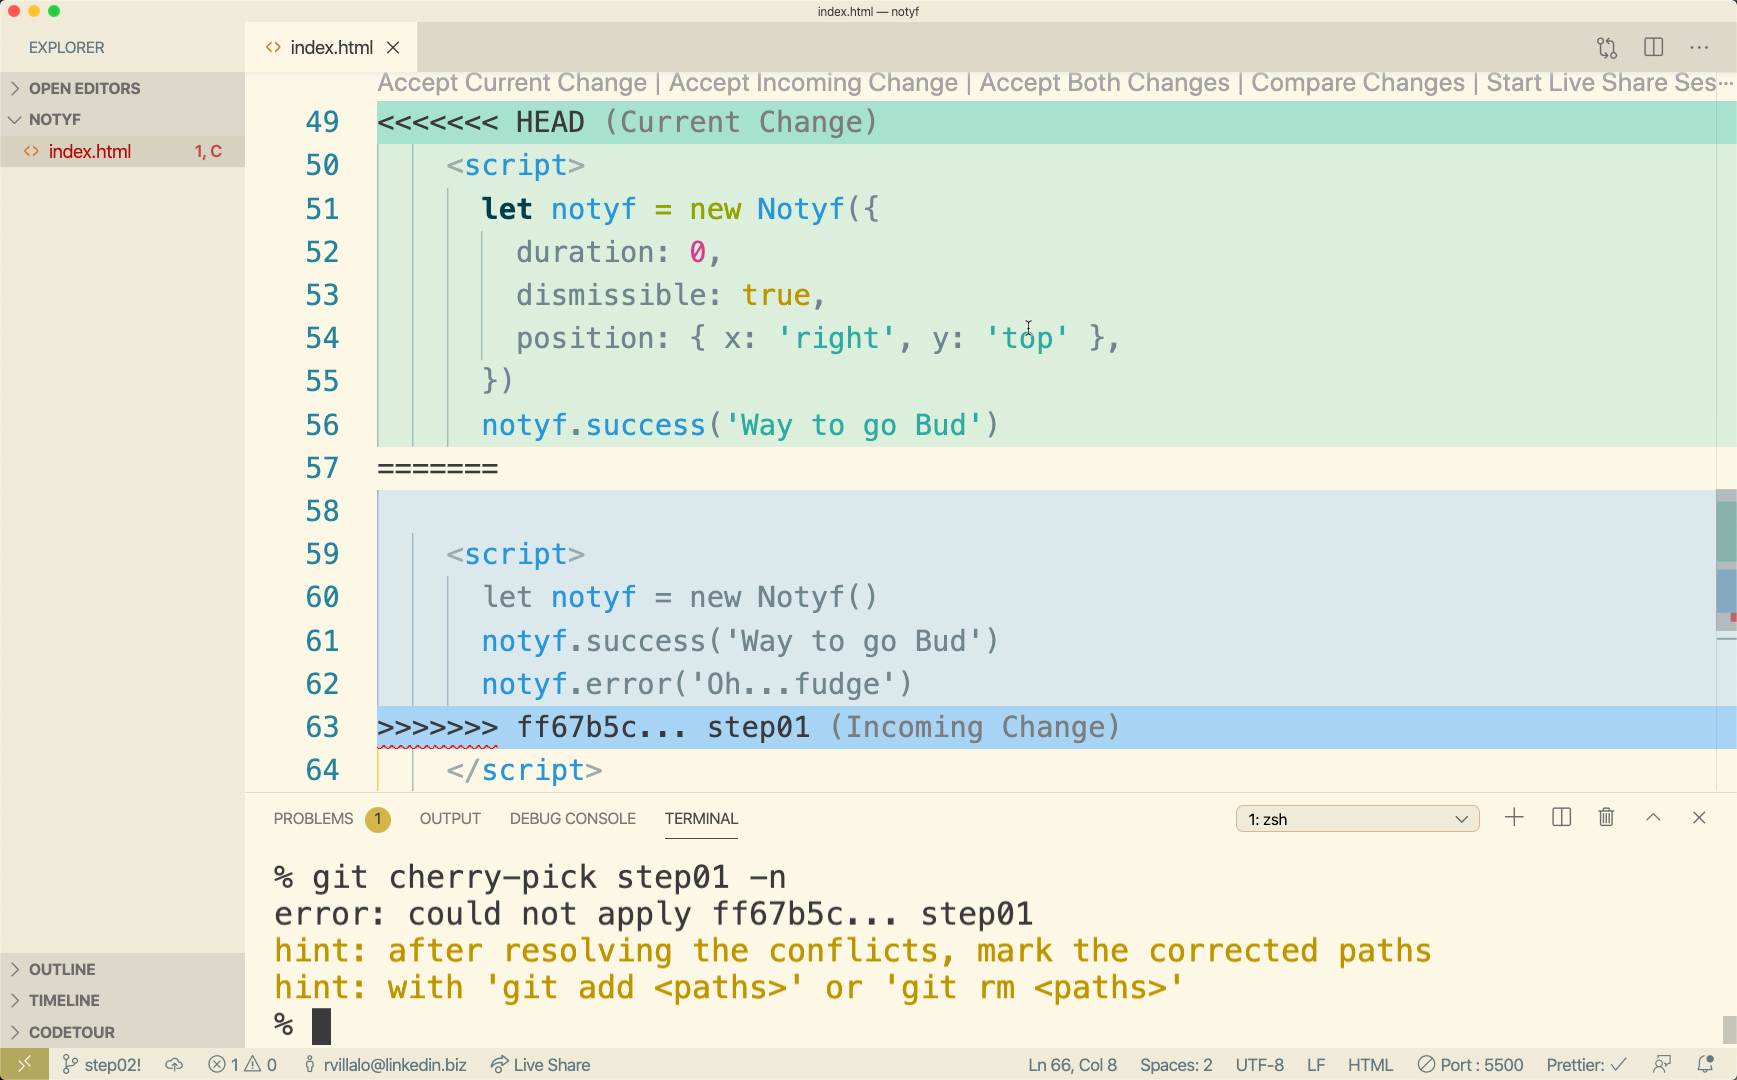
This is going to take a few steps, but it'll be worth it. First we can use a command called cherry-pick to rewind our code to what was happening in another branch.
git cherry-pick step01 -nCherry pick loads up and normally commits another branch or a commit from your commit log, but since we used the -n option here, it won't commit the changes. The problem now is that Visual Studio code being careful and all wants to make sure that since we're changing things we approve the changes.
Mercifully we can just accept all incoming changes using Visual Studio Code's command palette. Chooose View:Command palette or use the equivalent command key equivalent, then type in incoming and choose Merge Conflict Accept All Incoming.
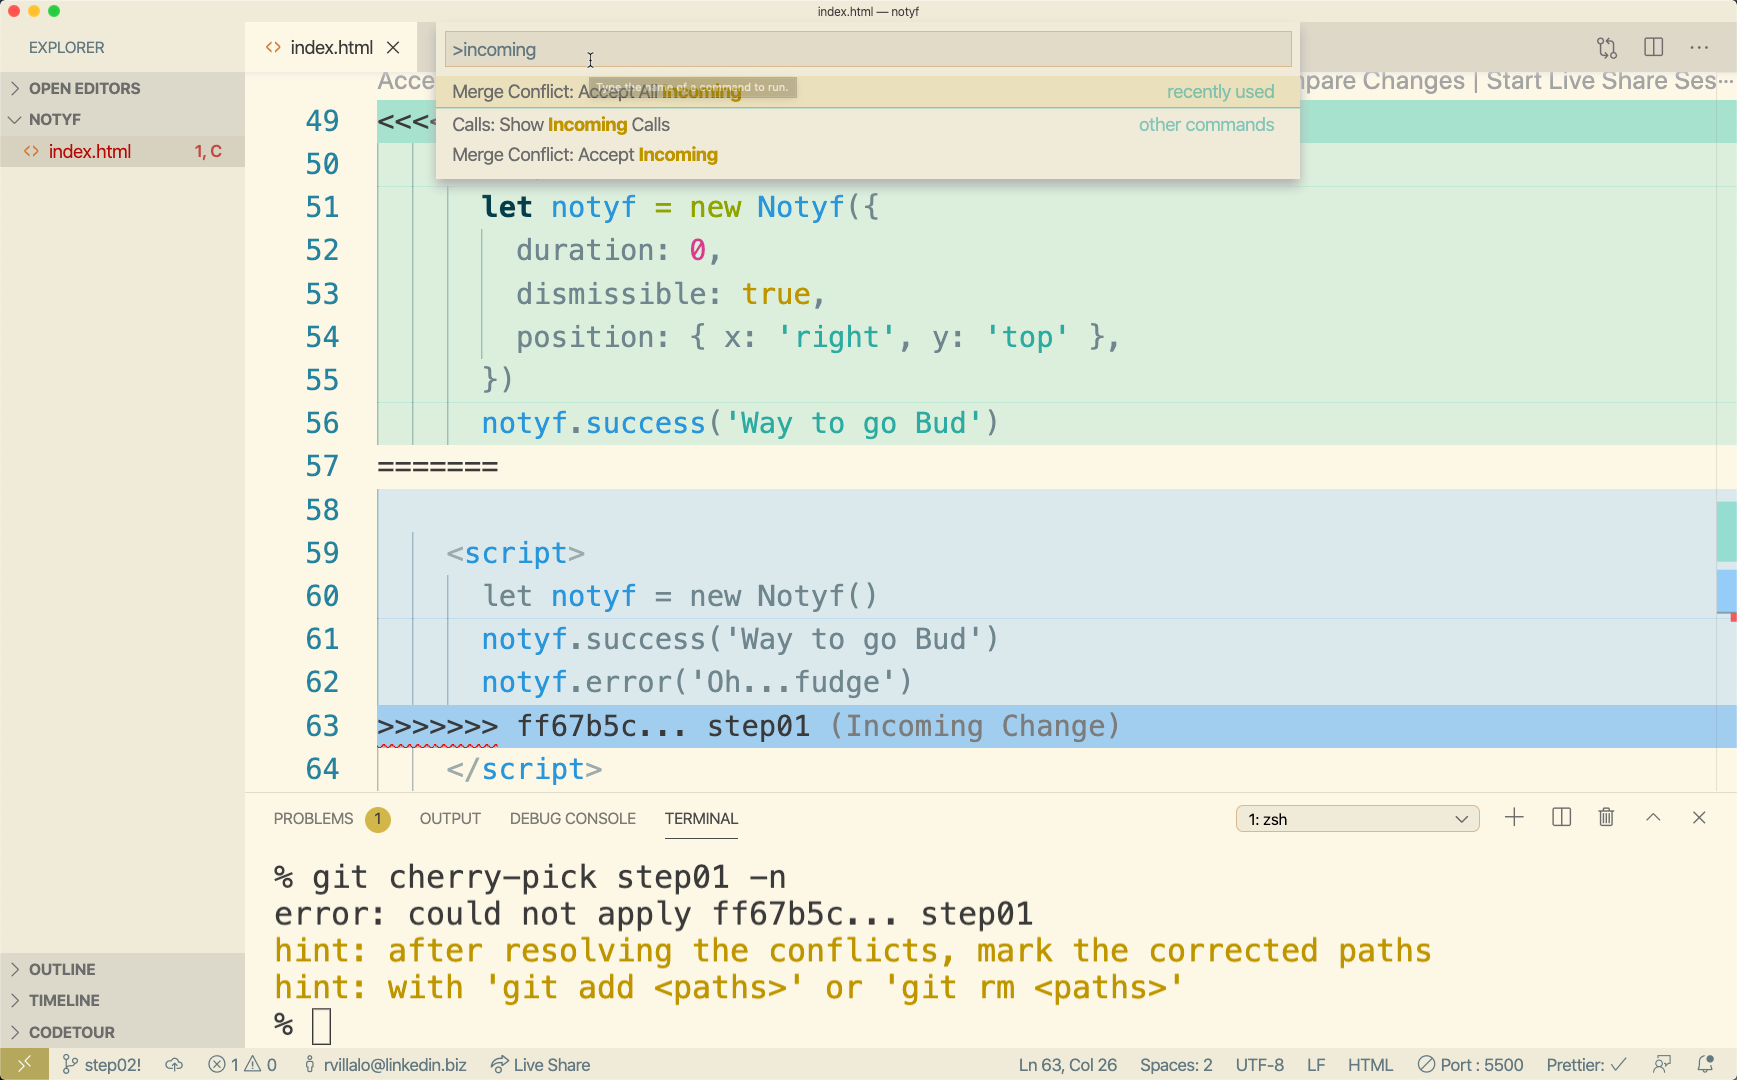
Now your code should look like step01, but we've lost our beautiful diff squares. To bring those back…
- First make sure you
saveyour changes, then let's reset the HEAD pointer quietly. - Reset the HEAD pointer quietly.
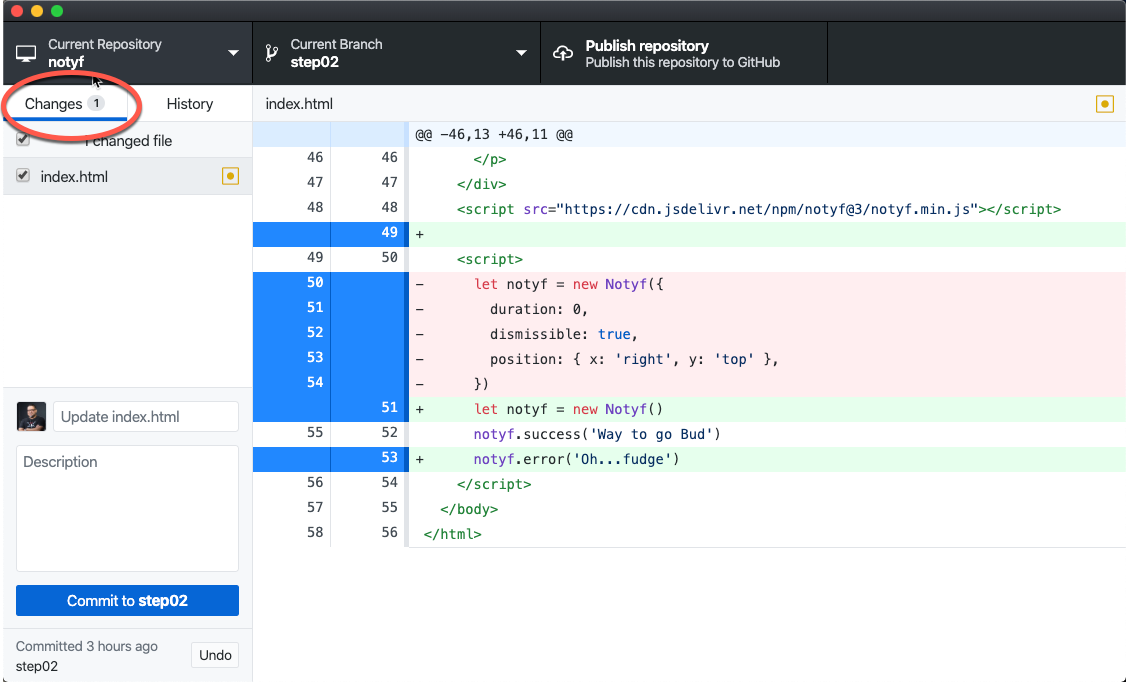
git reset HEAD -qNow our beautiful triangles/lines are there again showing you what you should be typing and you can go on with the demo for that. The Github Desktop App still has our previews, so if you want to have an overview of what you need to do, you can take a peek.
Posting your demo to Github
But, what about your students. What if they want to follow along with what you're doing or have access to your repo. Let's post this on Github as a Repo. There's a few ways you can do this, but the easiest is to use the Github Desktop App.
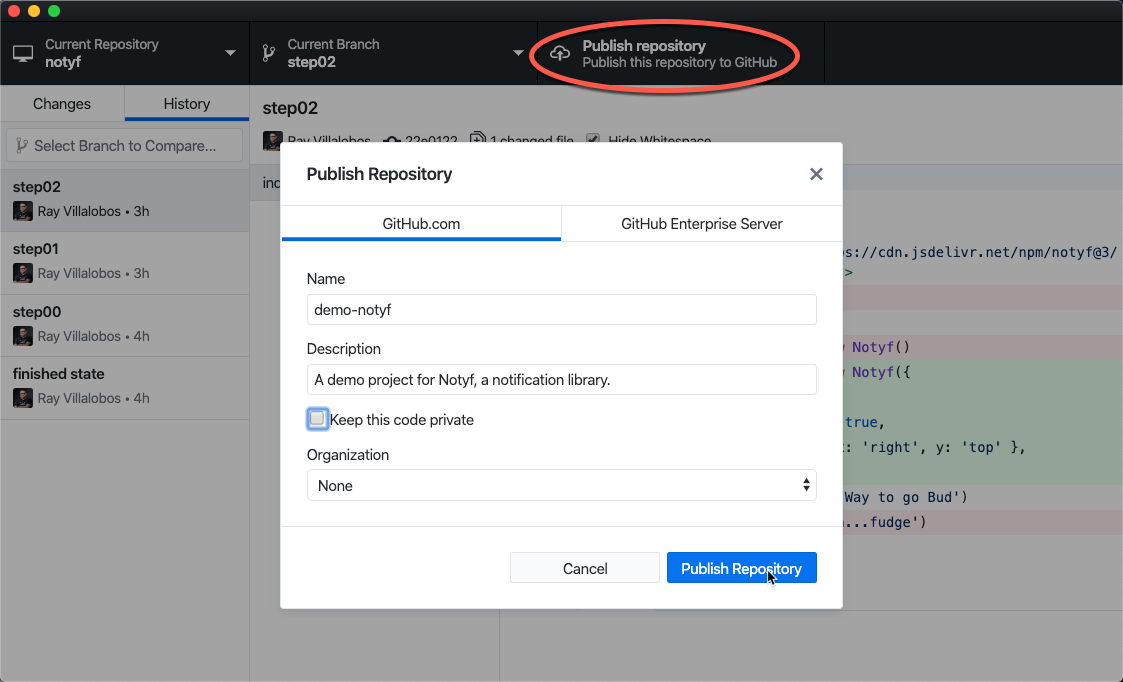
You can name your app here, add a description and choose wether to create a public or private repository. Now, this is only going to publish the branch that you're on; in our case that's step02. If you want to publish all branches.
- Go back to Visual Studio Code and issue a command to push ALL branches.
- Issue a
git pushcommand
git push --all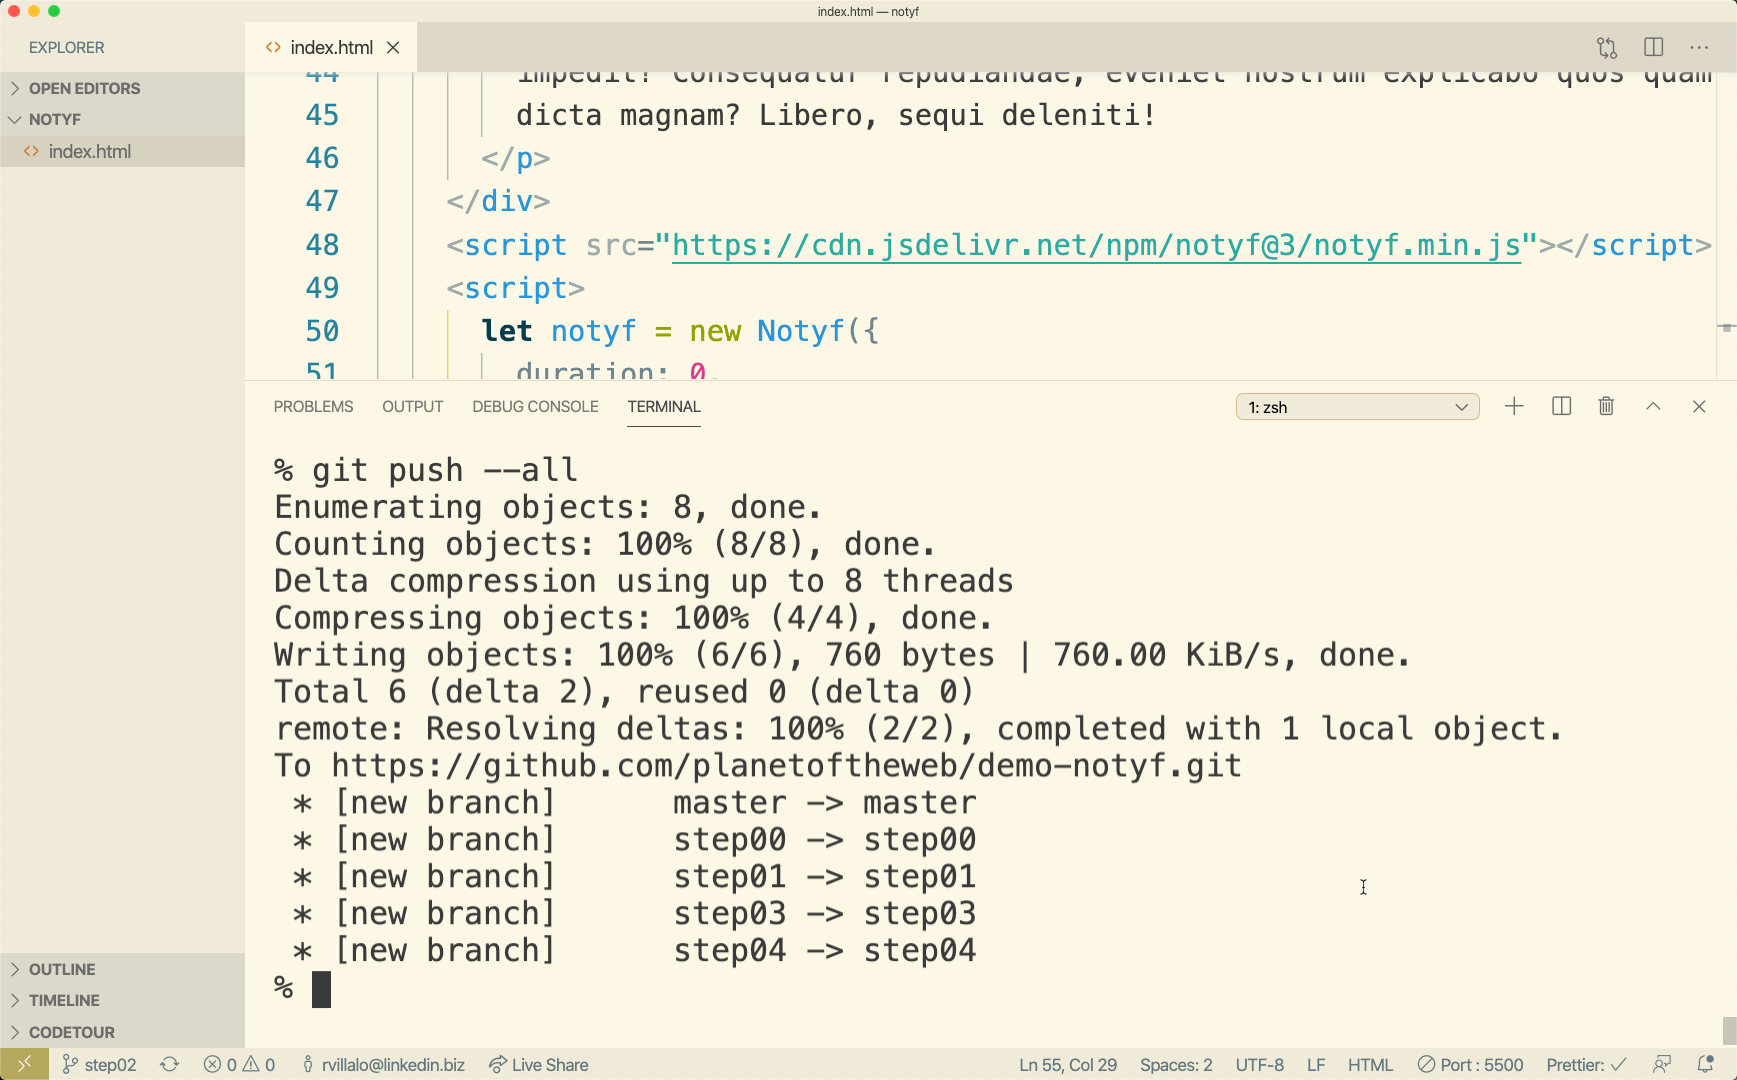
Compare branches with Github
Having all of your branches in Github gives you one more super power, the ability to compare branches and link to that comparison. Let's say that you want to send students a link to the changes happening between Step 01 and Step 02.
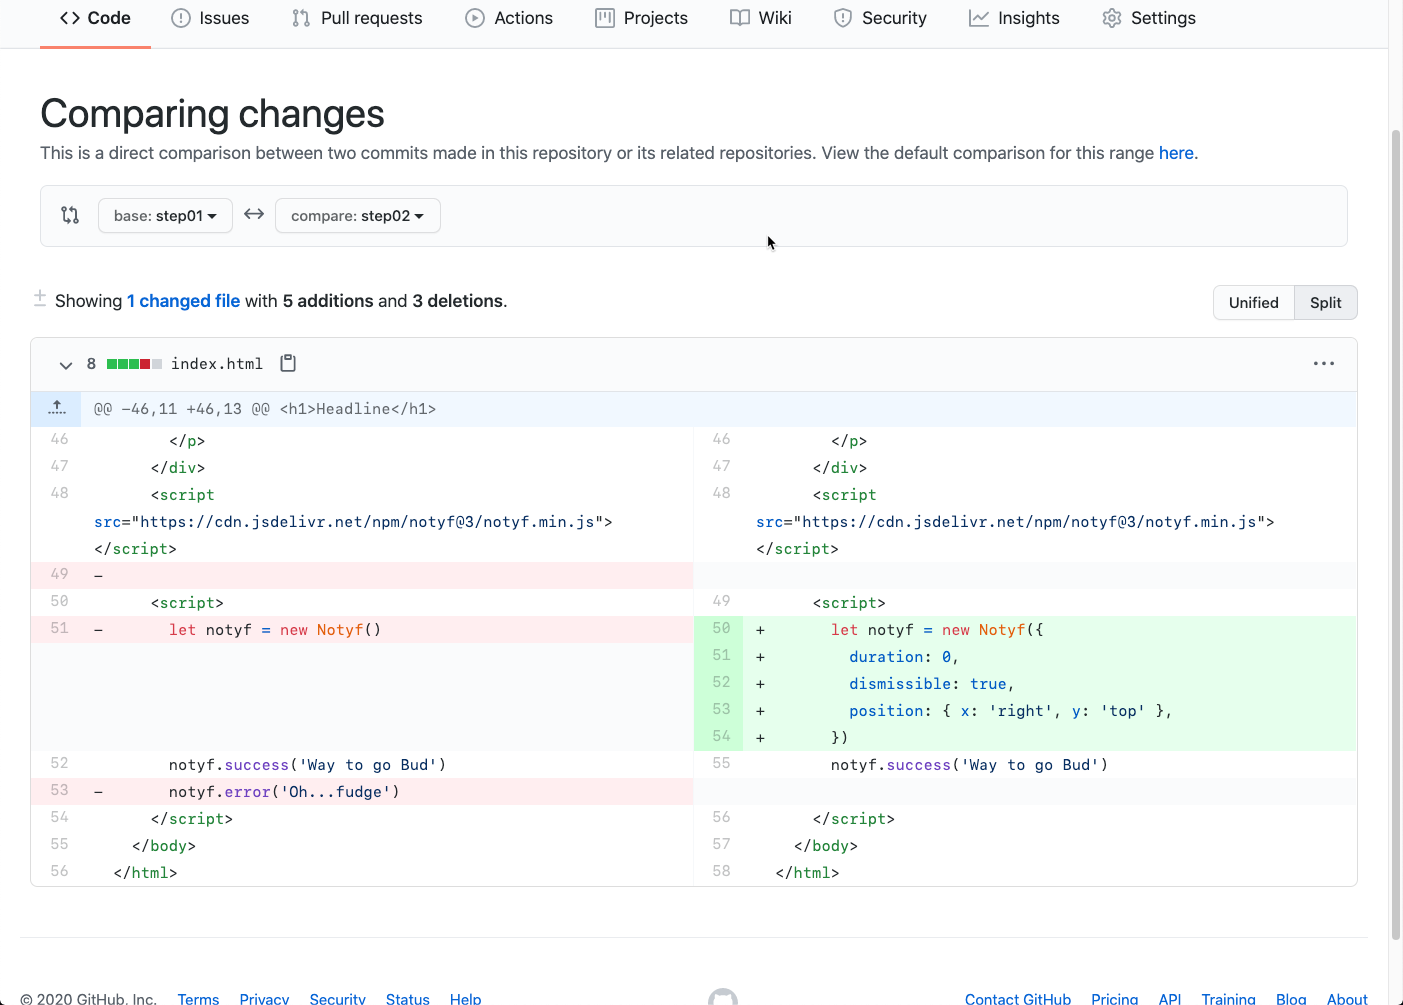
The formula for building those comparisons are as follows:
- The URL of your repo: https://github.com/planetoftheweb/demo-notyf/
- Add the word
compareat the end - Add the name of the first branch you're comparing from
step01 - Add two periods
.. - Add the name of the second branch you're comparing to
step02
So you can use this formula to compare any two branches.
Changing the default branch
If someone clones this repo, they will clone the first branch you pushed, you can change the default branch to our step00 branch, which has the beginning version of our code. You could set a different branch to be the default if you wanted students to start at a specific step or make the master branch the default and it would have the finished version of the code.
- Look for the branches link.
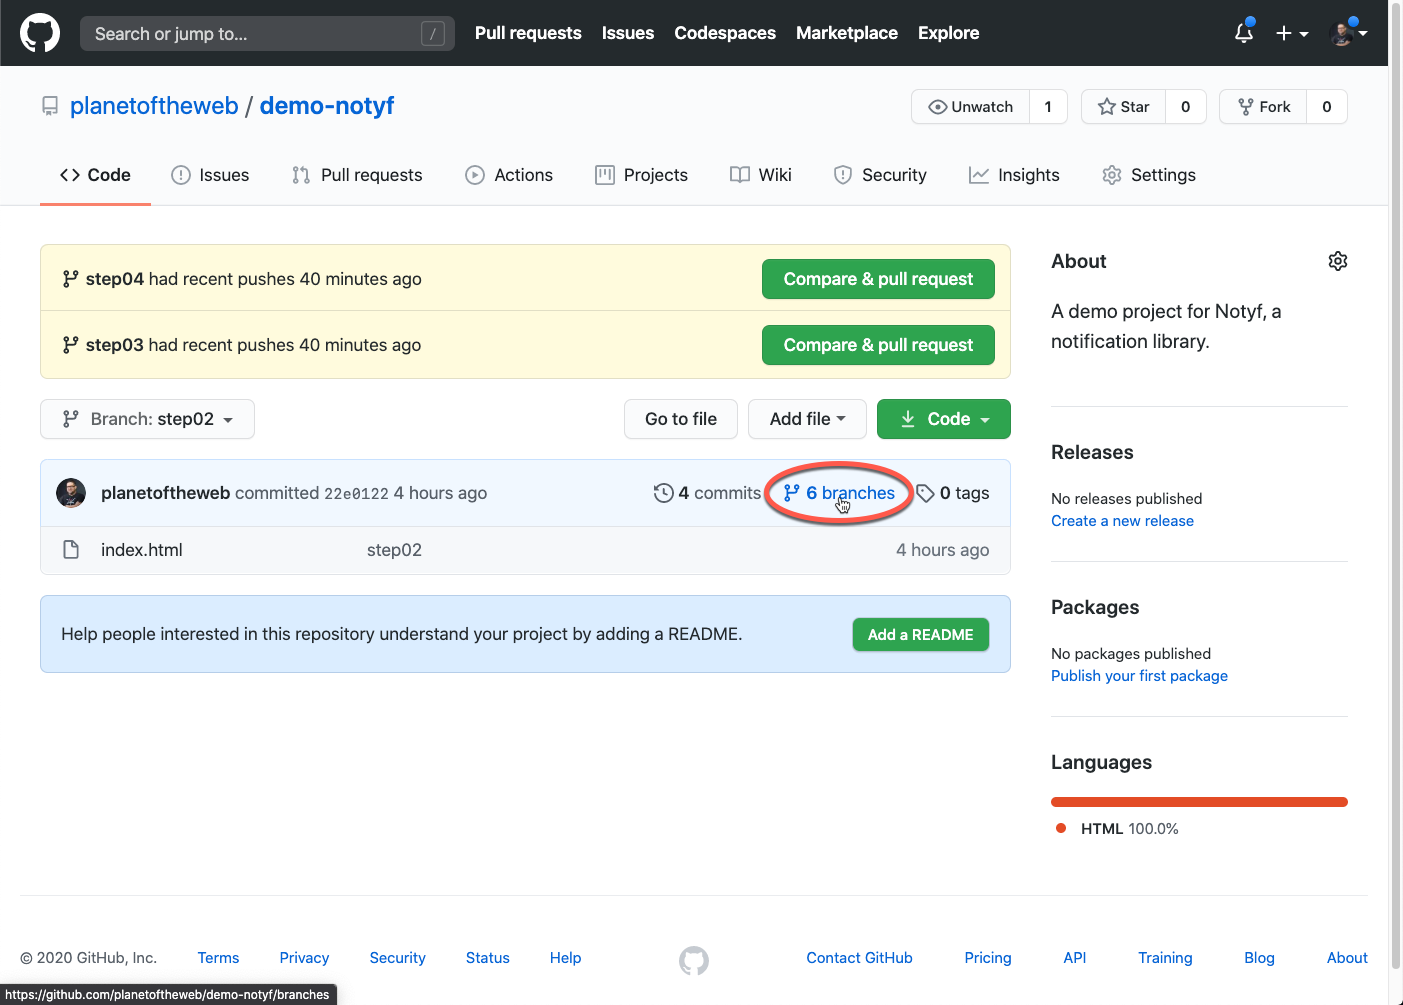
- Click on the change default branch button
- Choose the branch you want to set up as your default branch
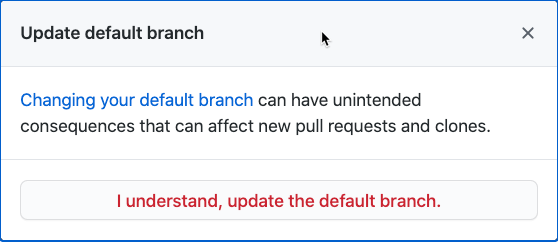
- Click on the update button
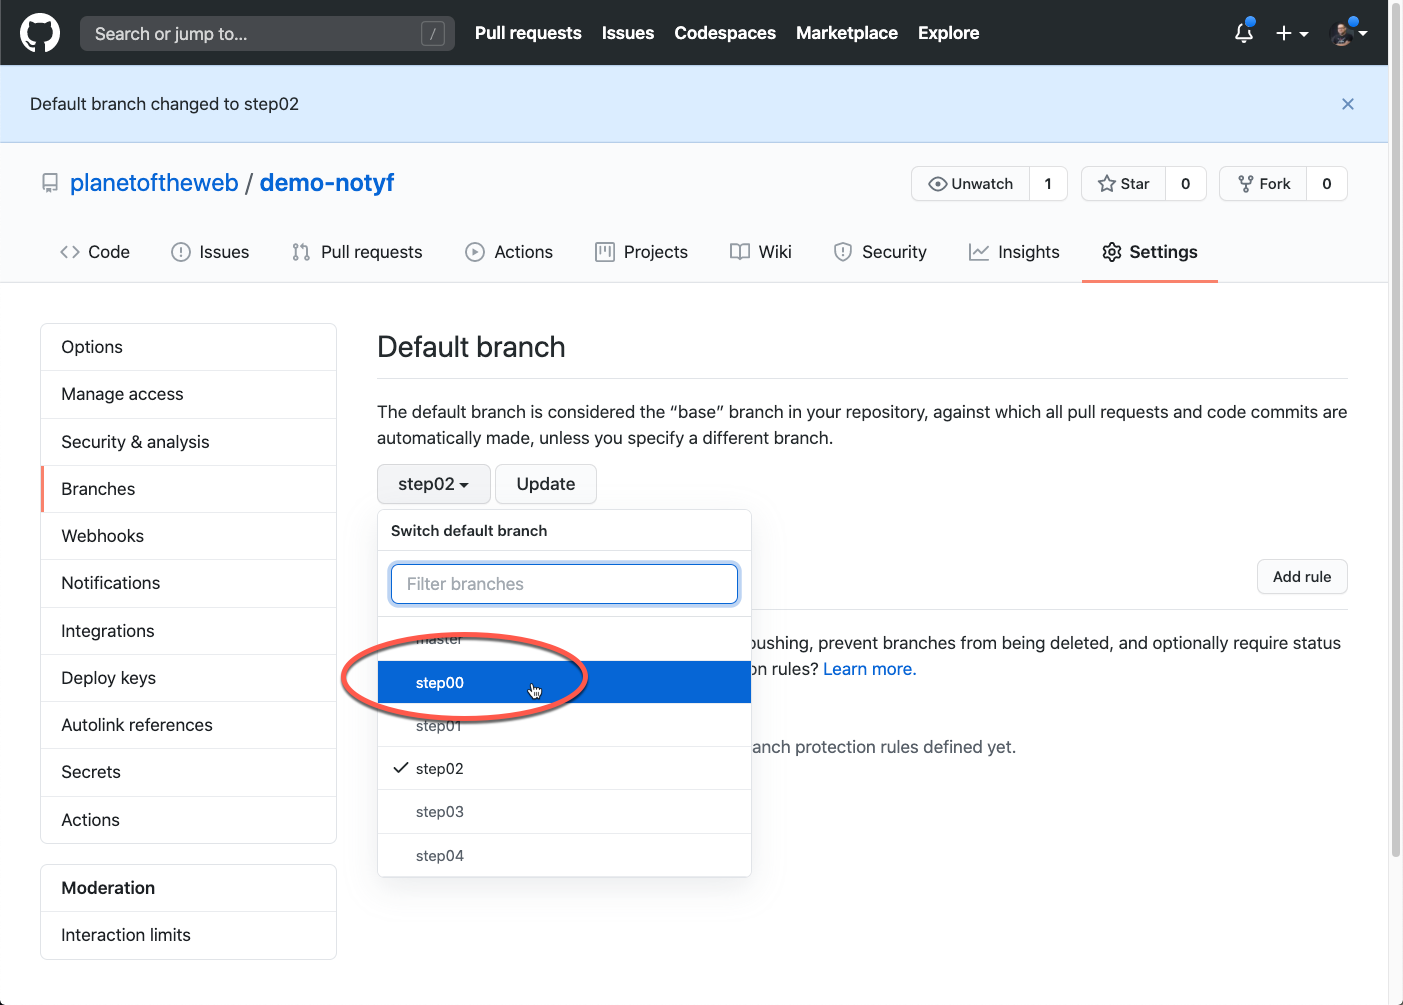
- Click on the I understand... button
Note: It might be a good idea to add a
README.mdfile to give a description of your project.
The advantages of publishing
The big advantage here is that each branch gives you a way to take a peek and what you're going to be typing and with Github Desktop, an overview of what you need to do. Hopefully that will put you at ease and help you do your live demos with confidence.