Using CodeSpaces to Create a Jailwind JIT Environment-Ep05
Create your own repo that can take the place of CodePen or a custom environment with your own node modules to install and run Tailwind CSS.
Hello everyone this is Ray Villalobos and I like to share cool front end and full stack tools every wednesday at 1pm, so follow me and subscribe on the social media networks for tons more content. If you want to watch any past episodes, learn about any of my courses, make sure you take a look at my blog...raybo.org.
Normally, I show you what I call the Toolbox Shorts next, a showcase of small tools. Since we're going to be building a playground in Tailwind CSS, I'm going to do something a little different today and show you those at the end.
Demos
CodeSwing is a Visual Studio Code extension that lets you create an interactive playground similar to CodePen, but with some significant advantages, so we'll take a look at how you install it, set it up and use it on Github through CodeSpaces.
Installing
Since it's a Visual Studio Code extension, the easiest way to install it is to find it in the extensions tab of the activity bar or go to the view menu and select extensions.
From there, you can click on the search extensions box and type in codeswing. Then hit the install button.
Creating a Swing
Now that it's installed you can start a swing by using the command palette. You can use the view menu or use the command key shortcut.
Type in CodeSwing, then choose one of the options:
- Add a swing in a directory
- Create one in a default location
- Open an existing Swing
- Make a swing from a template
- Open a Swing in a New Window
Since I know I'm going to use this later, I'll add a swing in a directory, then choose the location and give it a name.
Choosing a Template
You'll get an option to select a template to get started with. There's quite a few options for HTML, JavaScript, React, Svelte, Vue and lots of other pre-built templates.
I'm going to go with the first option, HTML/CSS/JavaScript.
You'll get three tabs as well as a preview window, so you can start coding right away.
What you get
Using the Playground
There are three tabs open as well as a preview. Let's hide the open editors. Lets try adding some HTML. Since I have the emmet extension on, I can use some shortcuts.
h1>Headline+ p*5>loremOne of the first advantages to CodePen is that I have the full power of visual studio code in an environment with all of my extensions and plugins. It's the editor I'm used to working in, with my own preferences, other extensions and Color Themes
Let's try some CSS
h1 {
  color: red;
}
This is a live preview that updates constantly. In the background webpack is managing all of your files and letting you see changes as you make them. I also get the full power of VSCode's Intellisense.
Let's try some simple JavaScript
document.querySelector("h1").innerText = "Welcome";Like in Codepen, we didn't have to use scripts or link tags to make the css and scripts interactive.
Changing the Layout
Now that we have a solid CodeSwing going, we should have more options in the command palette. Let's try changing the layout. Let's make sure all the files are saved fist.
Now I'll go to the command palette and change the layout.
There's lots of options, but I like the left layout for this amount of code.
Adding A Library
Let's try adding a library to make our code playground a bit better.
Let's add a container to make this align to our grid
.containerLet's also add some code to imrpove our text.
<div class="p-3 pb-md-4 mx-auto text-center">
  <h1 class="display-4 fw-normal"></h1>

  <p class="fs-5 text-muted"></p>
</div>
How is this Happening?
If you're a developer, you're probably wondering how it's doing all this. There's certainly some magic happening in the extension, but basically, it's using CDNs to load up the different libraries. CodeSwing already knows to look for the HTML, CSS and JS files and the way that it keeps track of the additional libraries we've added is the special codeswing.json file.
Lets take a peek.
{
  "scripts": [],
  "styles": ["https://cdnjs.cloudflare.com/ajax/libs/bootstrap/5.1.0/css/bootstrap.min.css"]
}
You can see that it's using a CDN to load up the minified version of Bootstrap.
Sharing with CodeSpaces
So far, this is great for maybe demos that you're doing in a classroom, but what if you want to share something with the world. That's where Github CodeSpaces will come in handy.
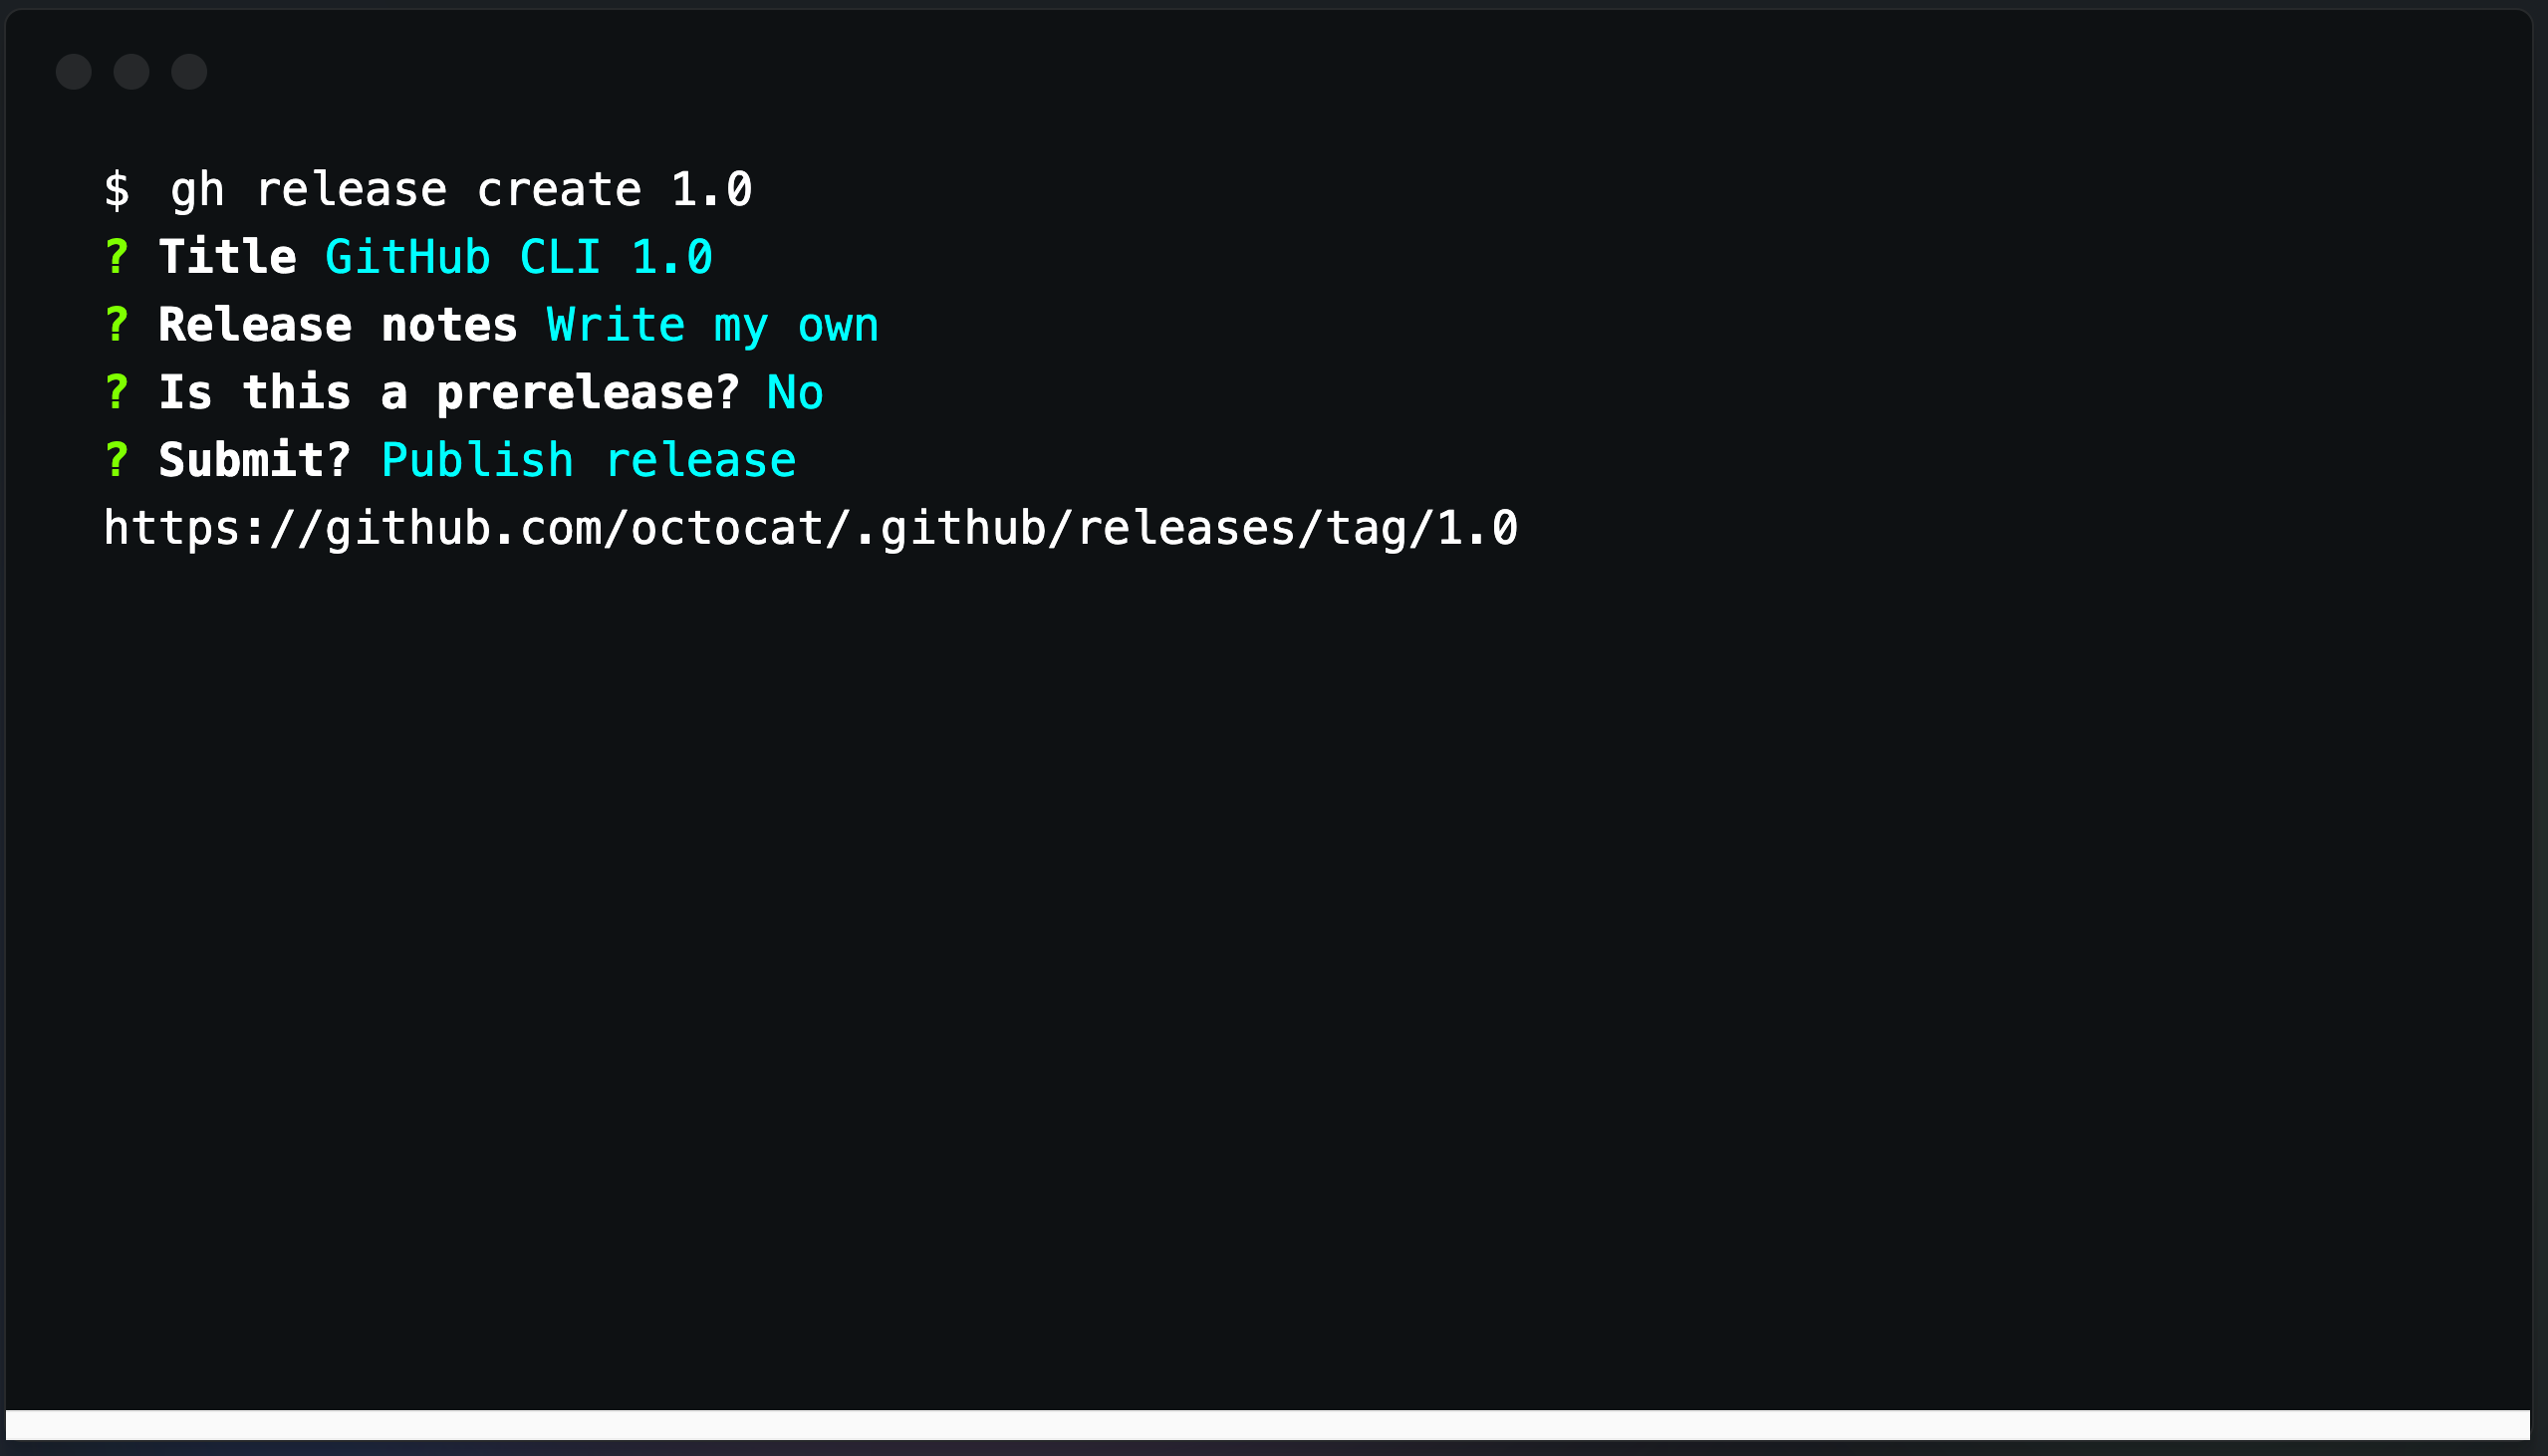
Let's go ahead create a new repo for this project. I'll call this bootswing, then I'll copy the terminal command to add the origin...because it's a bit long to remember.
git remote add origin URLNow, I'll go back to my desktop to initialize this as a git repository.
git initOpen up the terminal and add the URL to the new repo origin, then push the branch over.
git remote add origin URL
git push -u origin main
Adding a DevContainer File
Now, this will work for me, because I already have the codeswing extension installed and my local VSCode syncs to the remote. If someone comes to this repo and they don't have the CodeSwing extension, the experience wouldn't be as cool. So we'll make sure we add one more file to take care of that.
There's a special devcontainer.json file you can add to make sure you configure how the CodeSpaces environment works. .devcontainer/devcontainer.json.
{
  "extensions": ["codespaces-contrib.codeswing"]
}
Now if someone comes to this repo, they can just hit the period key to get the codeswing going. If they don't have CodeSwing install, it will prompt them to do it.
Template
You know this is a nice starter template that I could use in other projects, so I'm going to go to the settings tab, then click on the Template repository checkbox.
Now if you go to the top of the repo, you can create a new repository based on this one.
Tailswing Tooling
I want to create a Tailwind Just in time project using CodeSpaces. I can use this template I created for the CodeSwing, but it's going to need some additional tooling. That's because the JIT compiler is going to need some...well live compiling. Because of that, I'll need to use the regular version of CodeSpaces.
Setting up
Let's open up a terminal so we can set things up.
First, I'm going to need a package.json file.
npm init -yThis will create one with the defaults. We'll also need to install some modules.
npm install -D @tailwindcss/jit tailwindcss postcssTo get Tailwind going, we're going to need to install tailwindcss, plus the just in time module and postcss. Tailwind CSS is a PostCSS module.
We're going to need some configuration files as well including a tailwind.config.js and a postcss.config.js file. We can do that with this command.
npx tailwindcss init -pNow, we're going to need a script in the package.json file to start our container with.
"start": "tailwind -i ./src/src.css -o ./style.css --watch"I'll need to create a src.css file inside a src folder and inside there, we can add the basic imports for the different tailwind components.
@tailwind base;
@tailwind components;
@tailwind utilities;
Since we're not using Bootstrap, I'll need to remove the import from the styles section of the codeswing.json file.
{
  "scripts": [],
  "styles": []
}
Now, let's adjust the tailwind.config.js file so that we can use the JIT mode instead of regular mode.
We'll also need to identify the HTML as the file that needs to be verified for Tailwind Classes.
module.exports = {
mode: 'jit',
purge: [
	'./index.html'
],
...
Alright. One note, because the npm install command will confitnuously check the HTML and create a new css file, we're not going to be able to just type period to start this project or use the .dev URL, but we can still use codespaces. We'll have to edit the devcontainer.json to start our processes.
	"postCreateCommand": "npm install",
	"postStartCommand": "npm start"
You can check to see if this is working by opening a terminal and running the npm start command. Your preview should look real boring, but that's the sign tailwind is working.
Let's clear out the JavaScript since we're not going to need that for this playground.
Here's some adjustments to the HTML to try.
<div class="text-center">
  <h1 class="text-[50px] px-6 font-extrabold text-red-500 tracking-tight">Headline</h1>
  <p class="mt-4 max-w-2xl px-6 text-xl text-gray-500 mx-auto">
    Lorem, ipsum dolor sit amet consectetur adipisicing elit. Fugiat esse nesciunt cum, nulla obcaecati ipsam, commodi natus recusandae, dicta nostrum
    architecto. Ab dicta asperiores tempore quisquam magnam, ipsam nesciunt cupiditate.
  </p>
</div>
Toolbox Shorts
Since this is a special episode of the Toolbox, I'm going to go over some of the GitHub Tools, plus an extension you should definitely add to GitHub.
Hypercolor
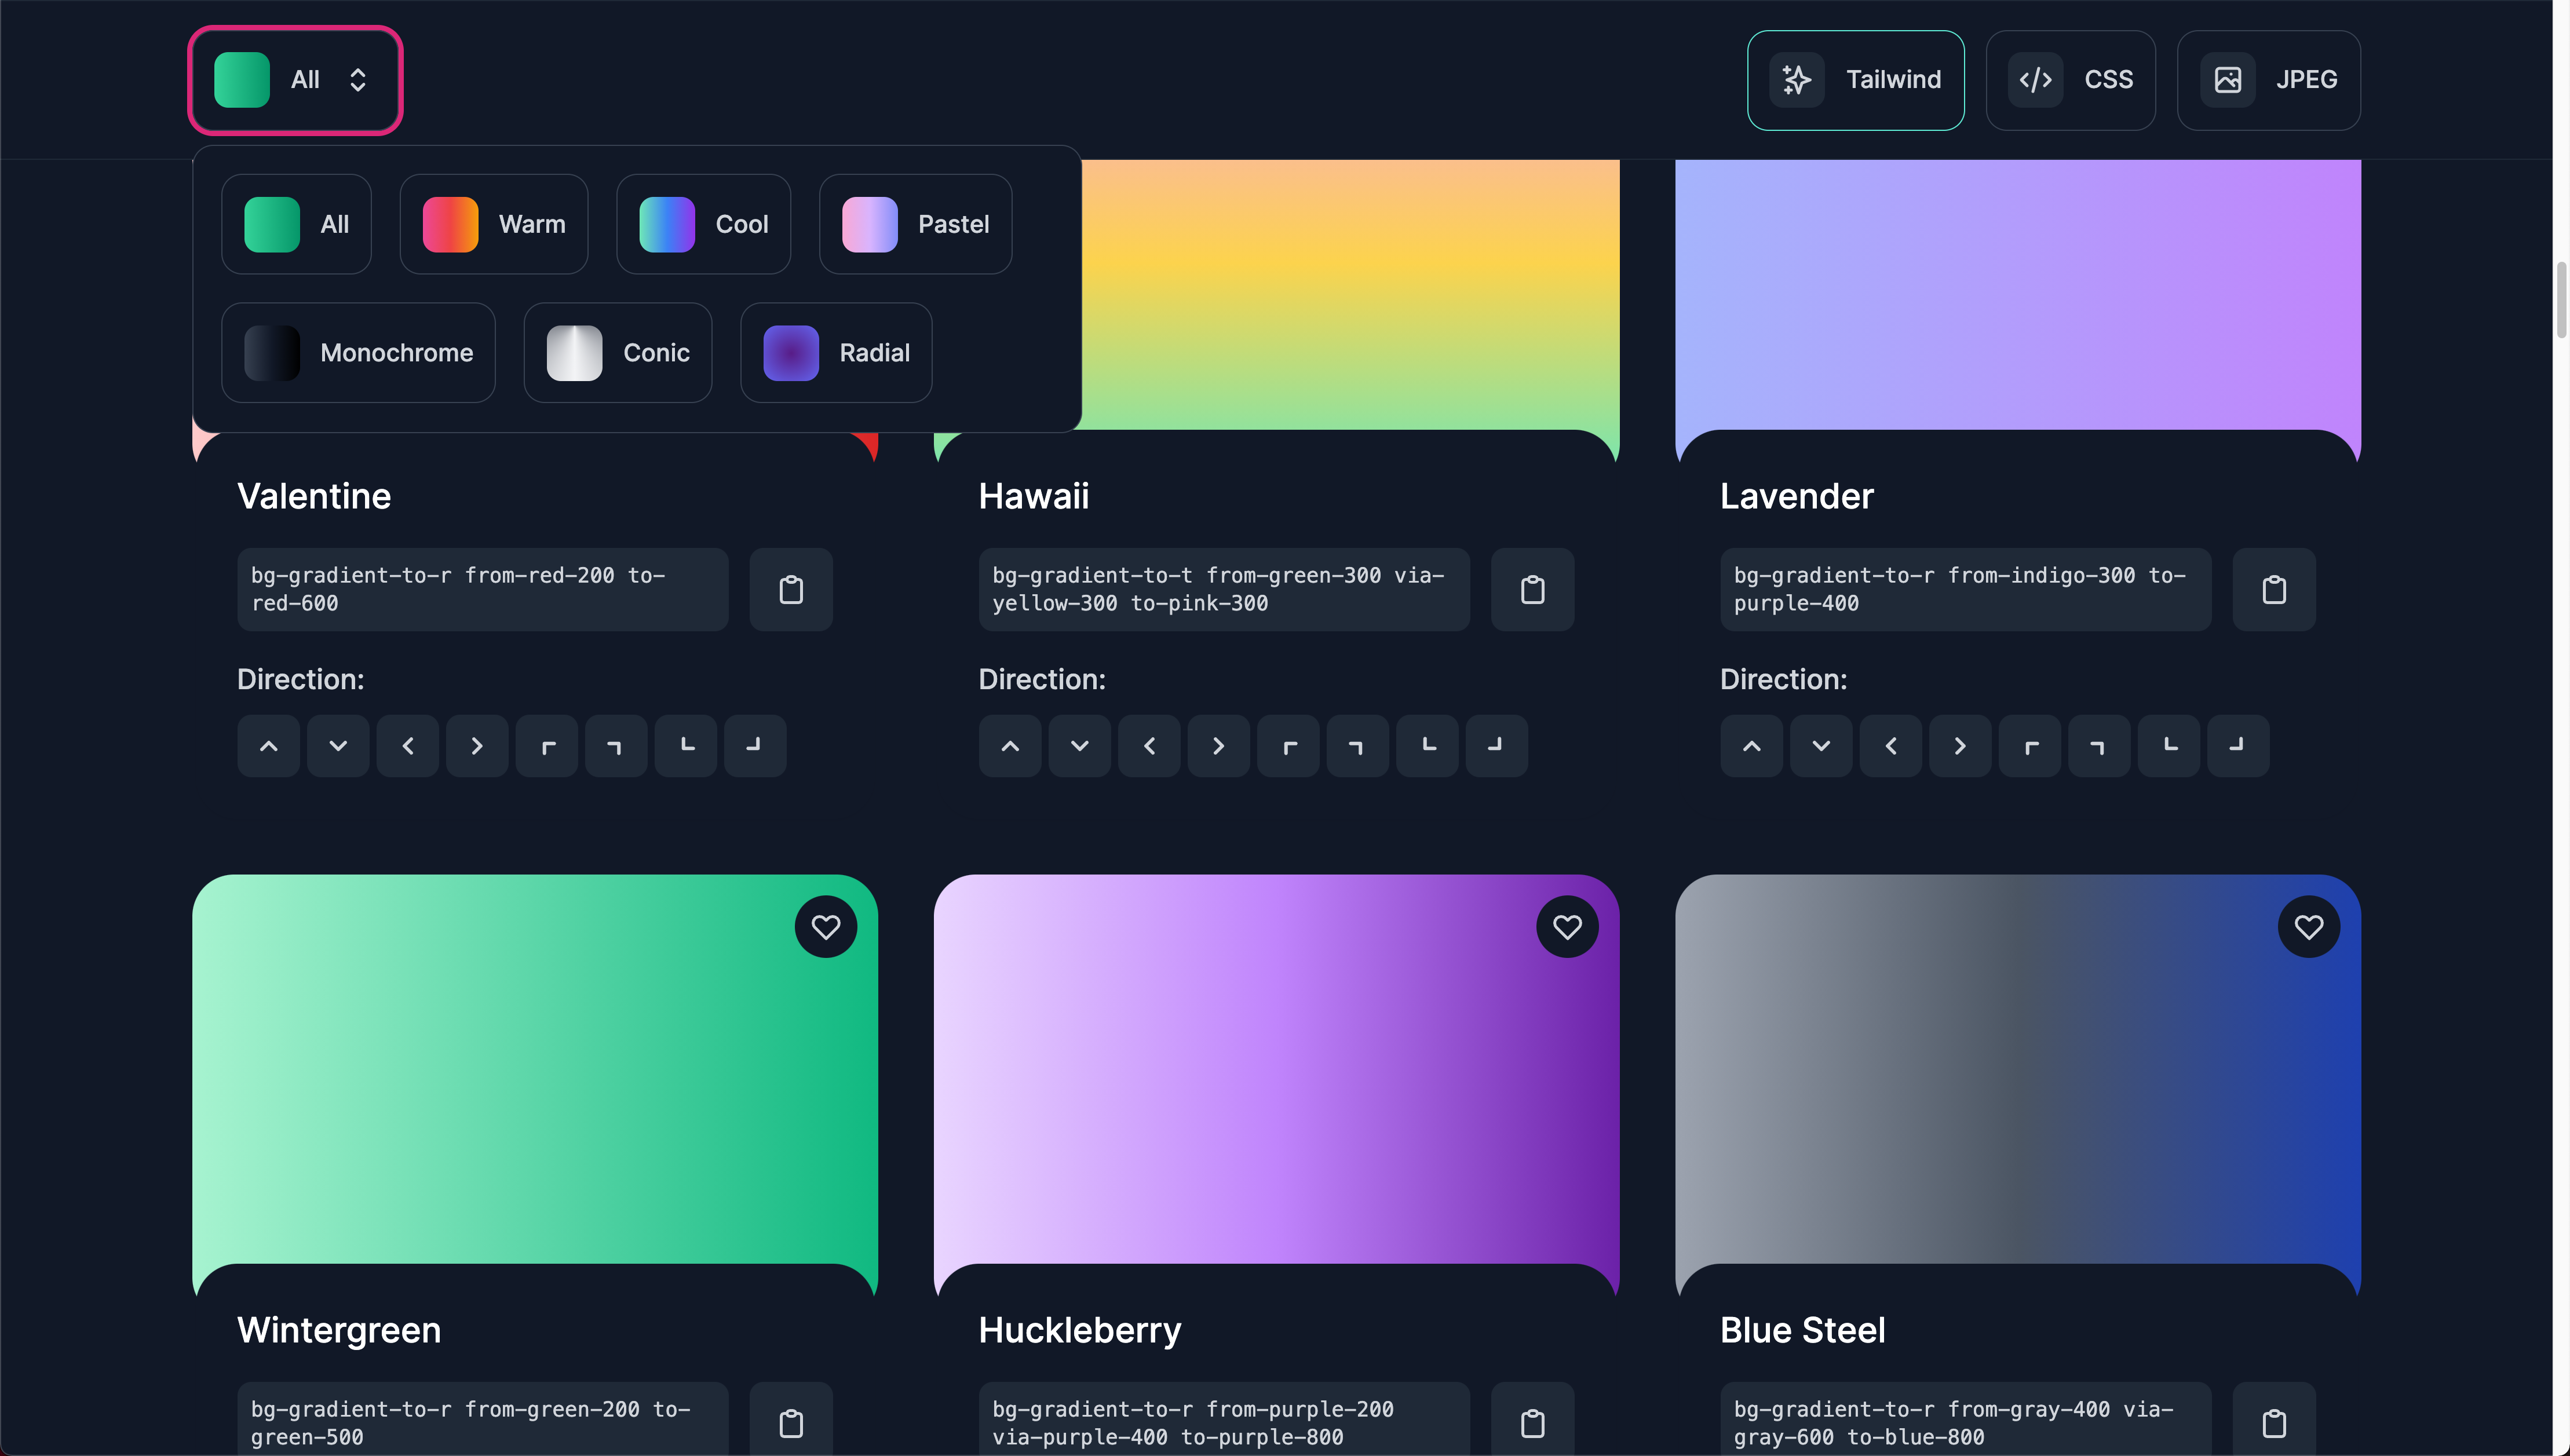
I can be a bit color challenged, so I appreciate a good site with inspiring gradients gives me the Tailwind or CSS code quickly. Great interface with lots of customization options."
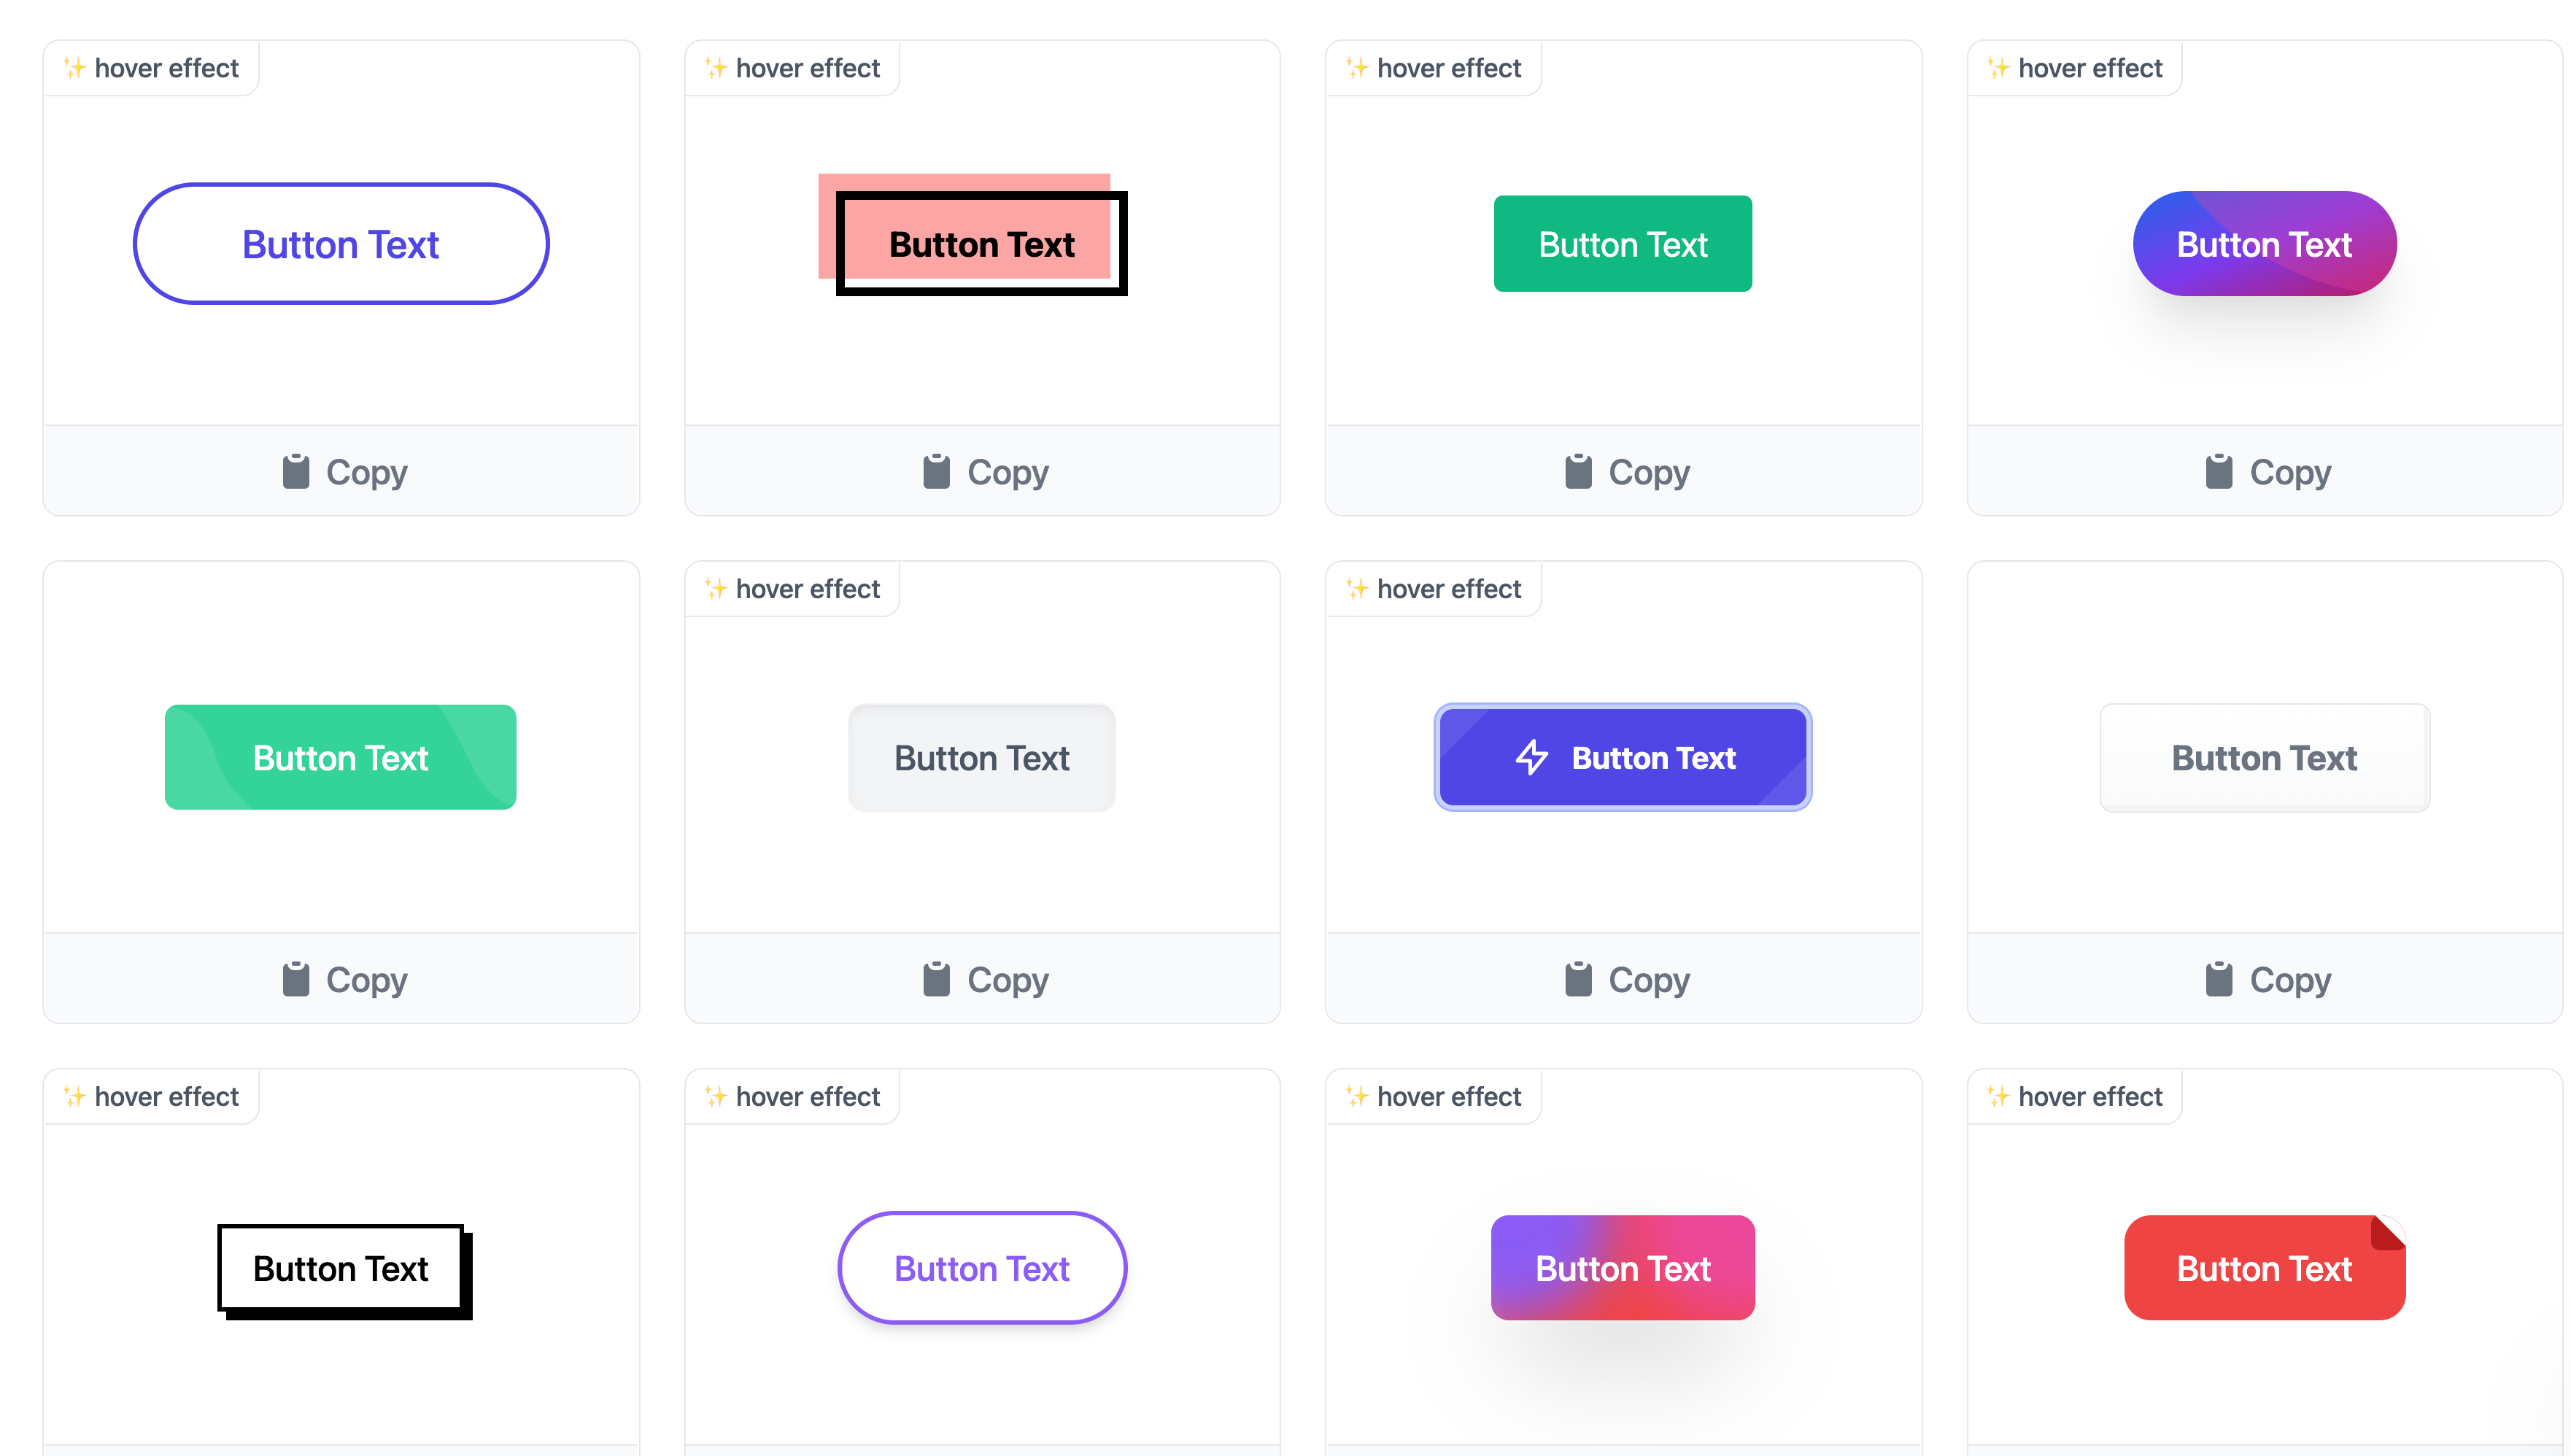
Tailwind Buttons
One of the hardest things to do in Tailwind CSS is figure out how to style a complex element like buttons. Here's a page with a ton of button styles that easily lets you copy the code for each one.
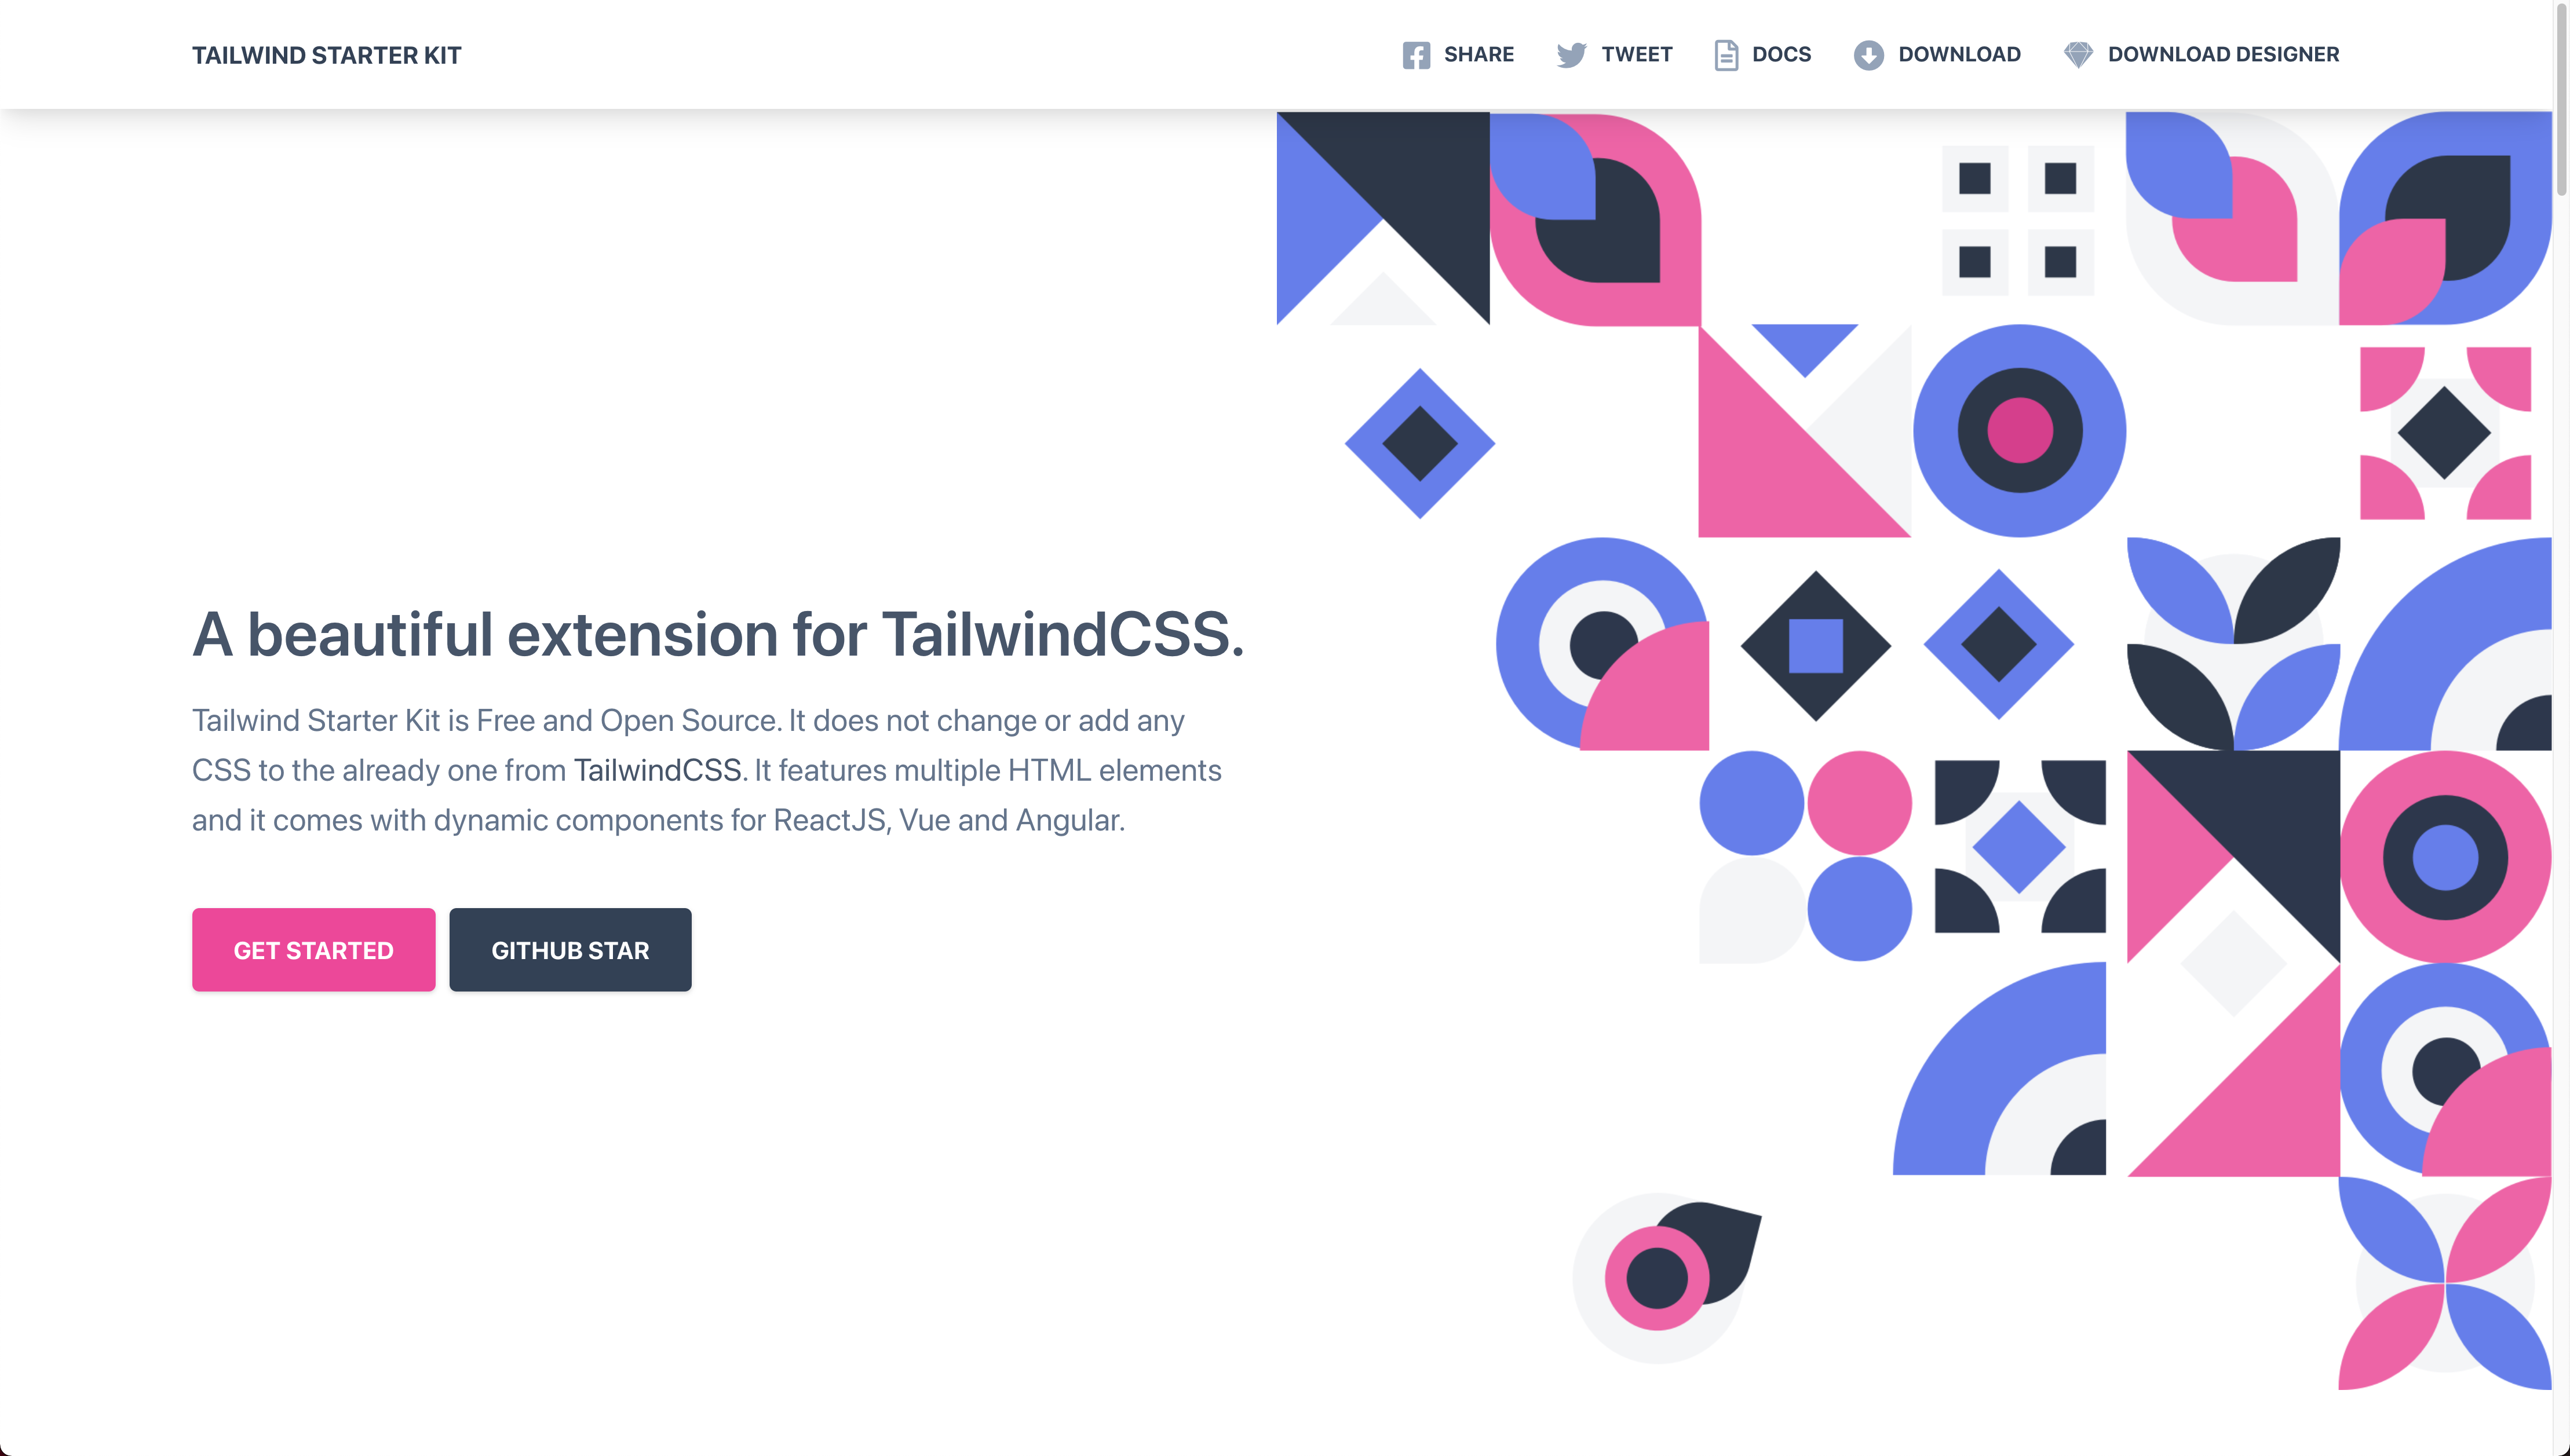
Tailwind Starter Kit
This is a set of component additions to Tailwind CSS to help you build websites quicker. It doesn't change the code you have to type for Tailwind CSS, but provides a set of interactive components with support for different frameworks including Vue/React and Angular."
Daisy UI
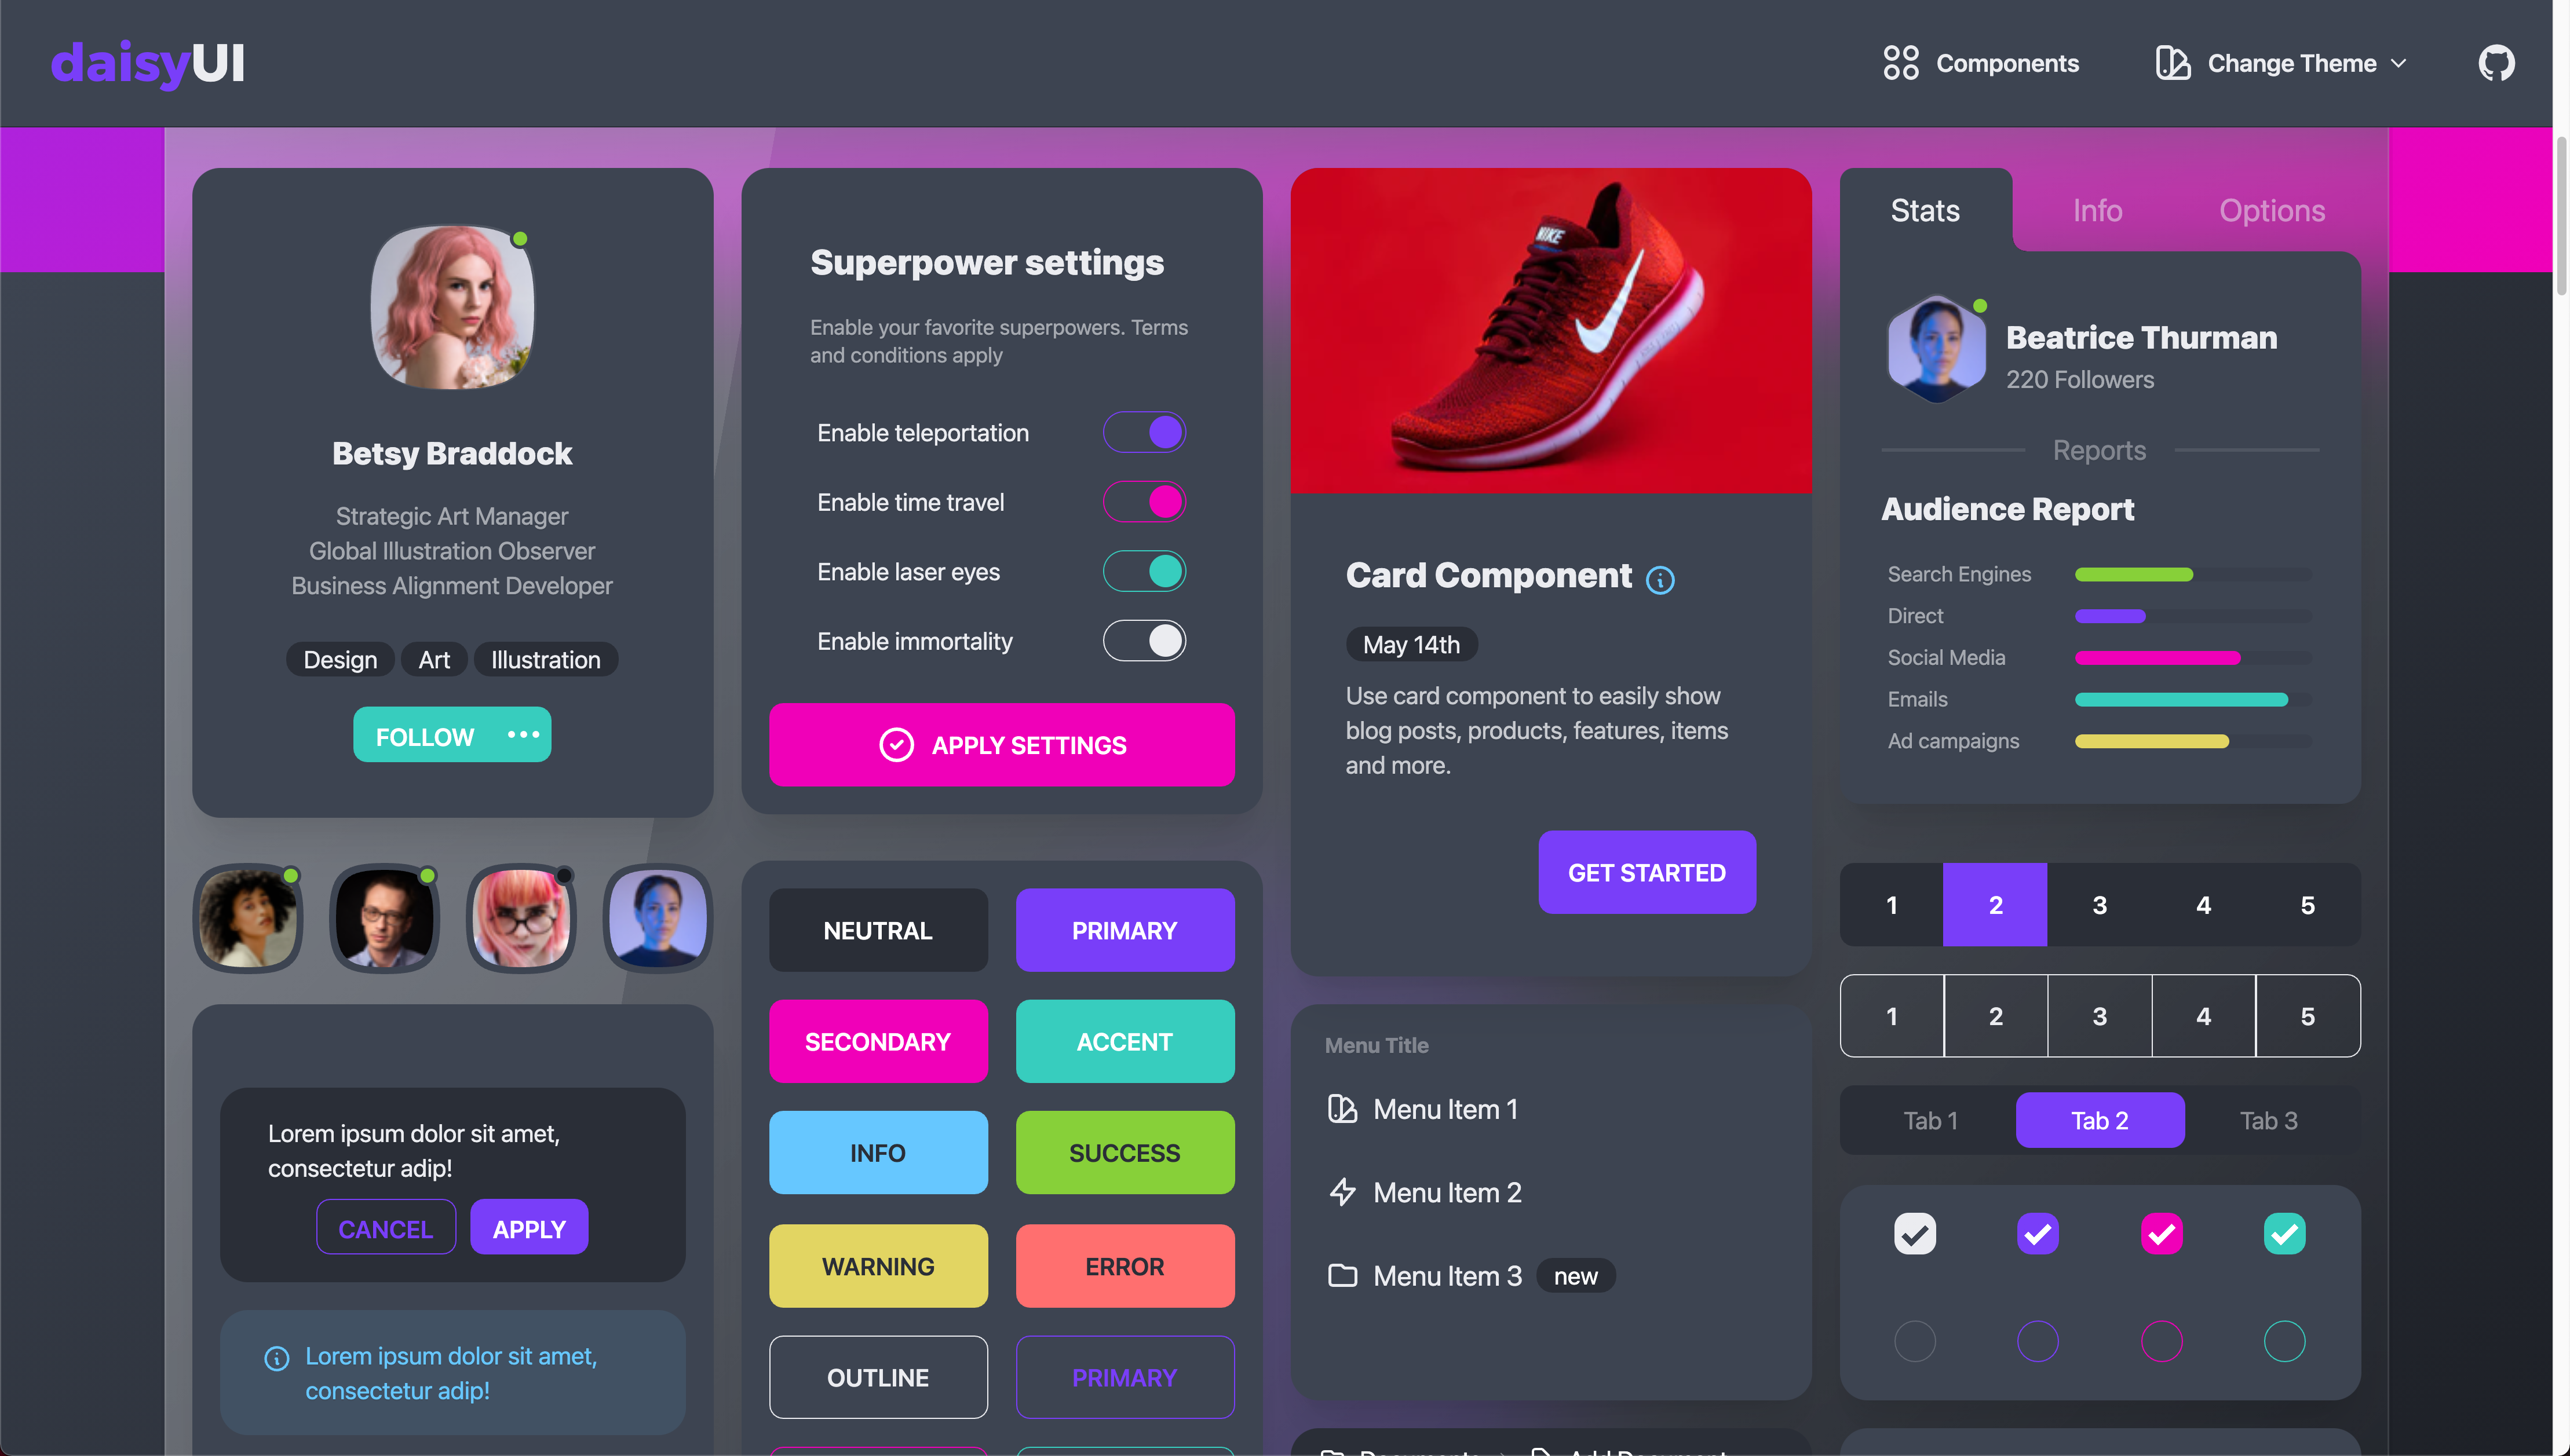
Tailwind is really just an engine for building components, but it doesn't include any components of it's own. Daisy UI uses Tailwind CSS and it gives you a set of components to build sites quicker. It installs as a Tailwind CSS plugin so it's easy to add to your existing project. Think of it as the missing Bootstrap-style link to Tailwind CSS.
Tailwind Kit
A beautiful UI component showcase for Tailwinds UI. It has a lot of smaller elements like buttons, forms, navigation and lists as well as larger templates for bigger things. Over 250 components and templates that are also React/Vue/Angular compatible.
Tailblocks
Tailwinds CSS is great, but it doesn't come with any built in components. A few industrious developers have been creating their own. This is a pretty good selection of ready to go components with everything from ecommerce, navigation, testimonials and blog elements you can copy and paste from. It also has an easy to use interface to copy and preview the blocks.
PostFix
What's New in Bootstrap 5.1

Next week on the Toolbox, we'll take a look at my favorite new features from the Bootstrap 5.1 update. They added a few new components that are pretty awesome.
layout: post
title: "Creating a Tailwind JIT Environment-Ep 05"
summary: "Create your own repo that can take the place of CodePen or a custom environment with your own node modules to install and run Tailwind CSS."
hideDesc: true
video: gHoXdPbiqjA
hero: /images/toolbox/episode05-tailwindsjit.jpg
thumb: /images/toolbox/episode05-tailwindsjit_tn.jpg
category: toolbox
Hello everyone this is Ray Villalobos and I like to share cool front end and full stack tools every wednesday at 1pm, so follow me and subscribe on the social media networks for tons more content. If you want to watch any past episodes, learn about any of my courses, make sure you take a look at my blog...raybo.org.
Normally, I show you what I call the Toolbox Shorts next, a showcase of small tools. Since we're going to be building a playground in Tailwind CSS, I'm going to do something a little different today and show you those at the end.
Demos
CodeSwing is a Visual Studio Code extension that lets you create an interactive playground similar to CodePen, but with some significant advantages, so we'll take a look at how you install it, set it up and use it on Github through CodeSpaces.
Installing
Since it's a Visual Studio Code extension, the easiest way to install it is to find it in the extensions tab of the activity bar or go to the view menu and select extensions.
From there, you can click on the search extensions box and type in codeswing. Then hit the install button.
Creating a Swing
Now that it's installed you can start a swing by using the command palette. You can use the view menu or use the command key shortcut.
Type in CodeSwing, then choose one of the options:
- Add a swing in a directory
- Create one in a default location
- Open an existing Swing
- Make a swing from a template
- Open a Swing in a New Window
Since I know I'm going to use this later, I'll add a swing in a directory, then choose the location and give it a name.
Choosing a Template
You'll get an option to select a template to get started with. There's quite a few options for HTML, JavaScript, React, Svelte, Vue and lots of other pre-built templates.
I'm going to go with the first option, HTML/CSS/JavaScript.
You'll get three tabs as well as a preview window, so you can start coding right away.
What you get
Using the Playground
There are three tabs open as well as a preview. Let's hide the open editors. Lets try adding some HTML. Since I have the emmet extension on, I can use some shortcuts.
h1>Headline+ p*5>loremOne of the first advantages to CodePen is that I have the full power of visual studio code in an environment with all of my extensions and plugins. It's the editor I'm used to working in, with my own preferences, other extensions and Color Themes
Let's try some CSS
h1 {
  color: red;
}
This is a live preview that updates constantly. In the background webpack is managing all of your files and letting you see changes as you make them. I also get the full power of VSCode's Intellisense.
Let's try some simple JavaScript
document.querySelector("h1").innerText = "Welcome";Like in Codepen, we didn't have to use scripts or link tags to make the css and scripts interactive.
Changing the Layout
Now that we have a solid CodeSwing going, we should have more options in the command palette. Let's try changing the layout. Let's make sure all the files are saved fist.
Now I'll go to the command palette and change the layout.
There's lots of options, but I like the left layout for this amount of code.
Adding A Library
Let's try adding a library to make our code playground a bit better.
Let's add a container to make this align to our grid
.containerLet's also add some code to imrpove our text.
<div class="p-3 pb-md-4 mx-auto text-center">
  <h1 class="display-4 fw-normal"></h1>

  <p class="fs-5 text-muted"></p>
</div>
How is this Happening?
If you're a developer, you're probably wondering how it's doing all this. There's certainly some magic happening in the extension, but basically, it's using CDNs to load up the different libraries. CodeSwing already knows to look for the HTML, CSS and JS files and the way that it keeps track of the additional libraries we've added is the special codeswing.json file.
Lets take a peek.
{
  "scripts": [],
  "styles": ["https://cdnjs.cloudflare.com/ajax/libs/bootstrap/5.1.0/css/bootstrap.min.css"]
}
You can see that it's using a CDN to load up the minified version of Bootstrap.
Sharing with CodeSpaces
So far, this is great for maybe demos that you're doing in a classroom, but what if you want to share something with the world. That's where Github CodeSpaces will come in handy.
Let's go ahead create a new repo for this project. I'll call this bootswing, then I'll copy the terminal command to add the origin...because it's a bit long to remember.
git remote add origin URLNow, I'll go back to my desktop to initialize this as a git repository.
git initOpen up the terminal and add the URL to the new repo origin, then push the branch over.
git remote add origin URL
git push -u origin main
Adding a DevContainer File
Now, this will work for me, because I already have the codeswing extension installed and my local VSCode syncs to the remote. If someone comes to this repo and they don't have the CodeSwing extension, the experience wouldn't be as cool. So we'll make sure we add one more file to take care of that.
There's a special devcontainer.json file you can add to make sure you configure how the CodeSpaces environment works. .devcontainer/devcontainer.json.
{
  "extensions": ["codespaces-contrib.codeswing"]
}
Now if someone comes to this repo, they can just hit the period key to get the codeswing going. If they don't have CodeSwing install, it will prompt them to do it.
Template
You know this is a nice starter template that I could use in other projects, so I'm going to go to the settings tab, then click on the Template repository checkbox.
Now if you go to the top of the repo, you can create a new repository based on this one.
Tailswing Tooling
I want to create a Tailwind Just in time project using CodeSpaces. I can use this template I created for the CodeSwing, but it's going to need some additional tooling. That's because the JIT compiler is going to need some...well live compiling. Because of that, I'll need to use the regular version of CodeSpaces.
Setting up
Let's open up a terminal so we can set things up.
First, I'm going to need a package.json file.
npm init -yThis will create one with the defaults. We'll also need to install some modules.
npm install -D @tailwindcss/jit tailwindcss postcssTo get Tailwind going, we're going to need to install tailwindcss, plus the just in time module and postcss. Tailwind CSS is a PostCSS module.
We're going to need some configuration files as well including a tailwind.config.js and a postcss.config.js file. We can do that with this command.
npx tailwindcss init -pNow, we're going to need a script in the package.json file to start our container with.
"start": "tailwind -i ./src/src.css -o ./style.css --watch"I'll need to create a src.css file inside a src folder and inside there, we can add the basic imports for the different tailwind components.
@tailwind base;
@tailwind components;
@tailwind utilities;
Since we're not using Bootstrap, I'll need to remove the import from the styles section of the codeswing.json file.
{
  "scripts": [],
  "styles": []
}
Now, let's adjust the tailwind.config.js file so that we can use the JIT mode instead of regular mode.
We'll also need to identify the HTML as the file that needs to be verified for Tailwind Classes.
module.exports = {
mode: 'jit',
purge: [
	'./index.html'
],
...
Alright. One note, because the npm install command will confitnuously check the HTML and create a new css file, we're not going to be able to just type period to start this project or use the .dev URL, but we can still use codespaces. We'll have to edit the devcontainer.json to start our processes.
	"postCreateCommand": "npm install",
	"postStartCommand": "npm start"
You can check to see if this is working by opening a terminal and running the npm start command. Your preview should look real boring, but that's the sign tailwind is working.
Let's clear out the JavaScript since we're not going to need that for this playground.
Here's some adjustments to the HTML to try.
<div class="text-center">
  <h1 class="text-[50px] px-6 font-extrabold text-red-500 tracking-tight">Headline</h1>
  <p class="mt-4 max-w-2xl px-6 text-xl text-gray-500 mx-auto">
    Lorem, ipsum dolor sit amet consectetur adipisicing elit. Fugiat esse nesciunt cum, nulla obcaecati ipsam, commodi natus recusandae, dicta nostrum
    architecto. Ab dicta asperiores tempore quisquam magnam, ipsam nesciunt cupiditate.
  </p>
</div>
Toolbox Shorts
Since this is a special episode of the Toolbox, I'm going to go over some of the GitHub Tools, plus an extension you should definitely add to GitHub.
Hypercolor
I can be a bit color challenged, so I appreciate a good site with inspiring gradients gives me the Tailwind or CSS code quickly. Great interface with lots of customization options."
Tailwind Buttons
One of the hardest things to do in Tailwind CSS is figure out how to style a complex element like buttons. Here's a page with a ton of button styles that easily lets you copy the code for each one.
Tailwind Starter Kit
This is a set of component additions to Tailwind CSS to help you build websites quicker. It doesn't change the code you have to type for Tailwind CSS, but provides a set of interactive components with support for different frameworks including Vue/React and Angular."
Daisy UI
Tailwind is really just an engine for building components, but it doesn't include any components of it's own. Daisy UI uses Tailwind CSS and it gives you a set of components to build sites quicker. It installs as a Tailwind CSS plugin so it's easy to add to your existing project. Think of it as the missing Bootstrap-style link to Tailwind CSS.
Tailwind Kit
A beautiful UI component showcase for Tailwinds UI. It has a lot of smaller elements like buttons, forms, navigation and lists as well as larger templates for bigger things. Over 250 components and templates that are also React/Vue/Angular compatible.
Tailblocks
Tailwinds CSS is great, but it doesn't come with any built in components. A few industrious developers have been creating their own. This is a pretty good selection of ready to go components with everything from ecommerce, navigation, testimonials and blog elements you can copy and paste from. It also has an easy to use interface to copy and preview the blocks.
PostFix
What's New in Bootstrap 5.1
Next week on the Toolbox, we'll take a look at my favorite new features from the Bootstrap 5.1 update. They added a few new components that are pretty awesome.